Discipline
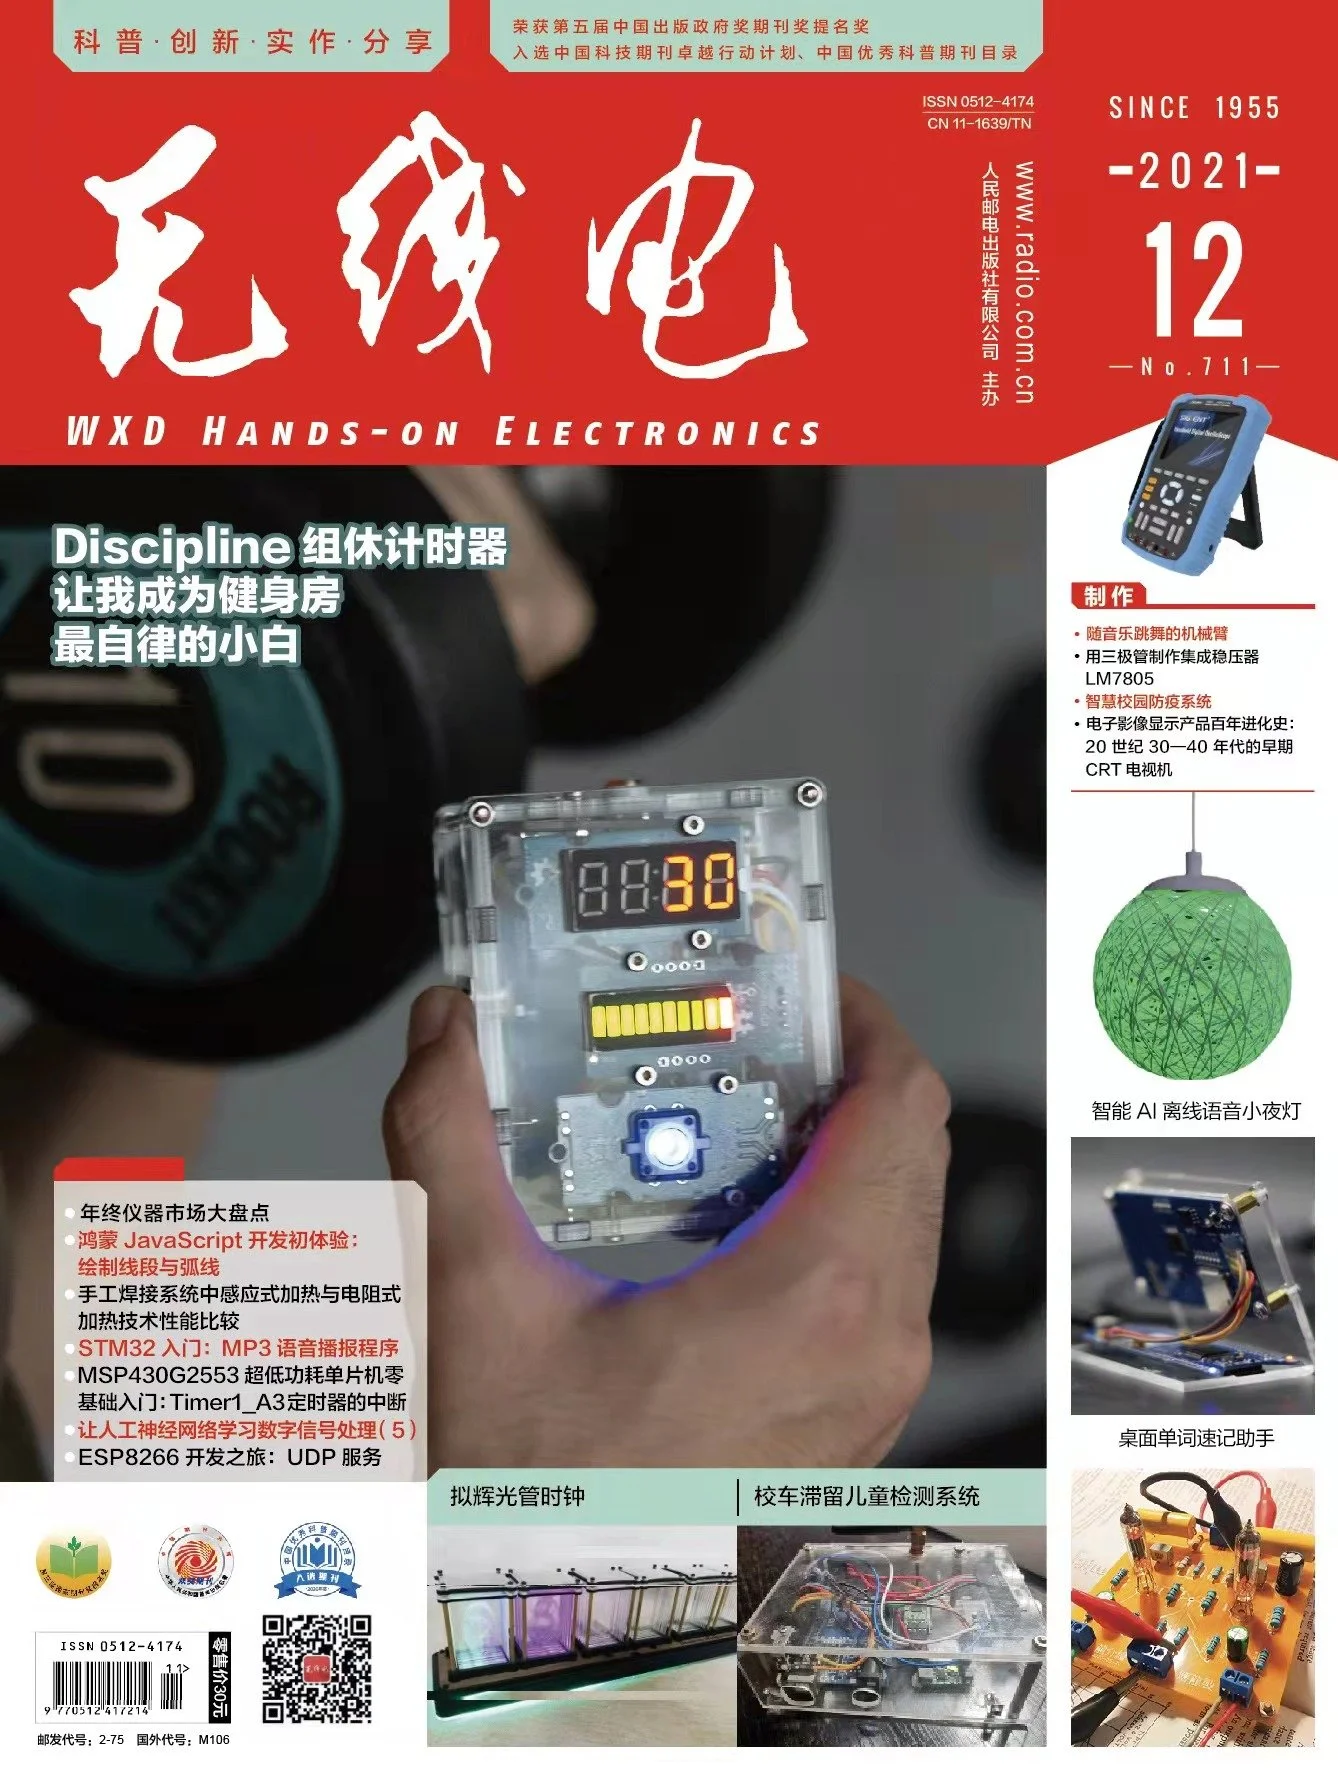
Discipline is a DIY timer that helps you strictly control interval rest during muscle training, and helps to achieve the purpose of improving training intensity and training effectiveness.
With only two buttons and two display screens, its simple UI allows users to get started in the shortest time and reduces the pain points of complex settings when using traditional timers.
Its compact and tight design makes it the size of a smartphone, users can easily hold it in their hands and operate it with just two fingers. With its magnetic design on the back, more in line with the use of the gym’s strength area, users can attach it to almost any training equipment, to ensure that all interactions are in sight of the occurrence.
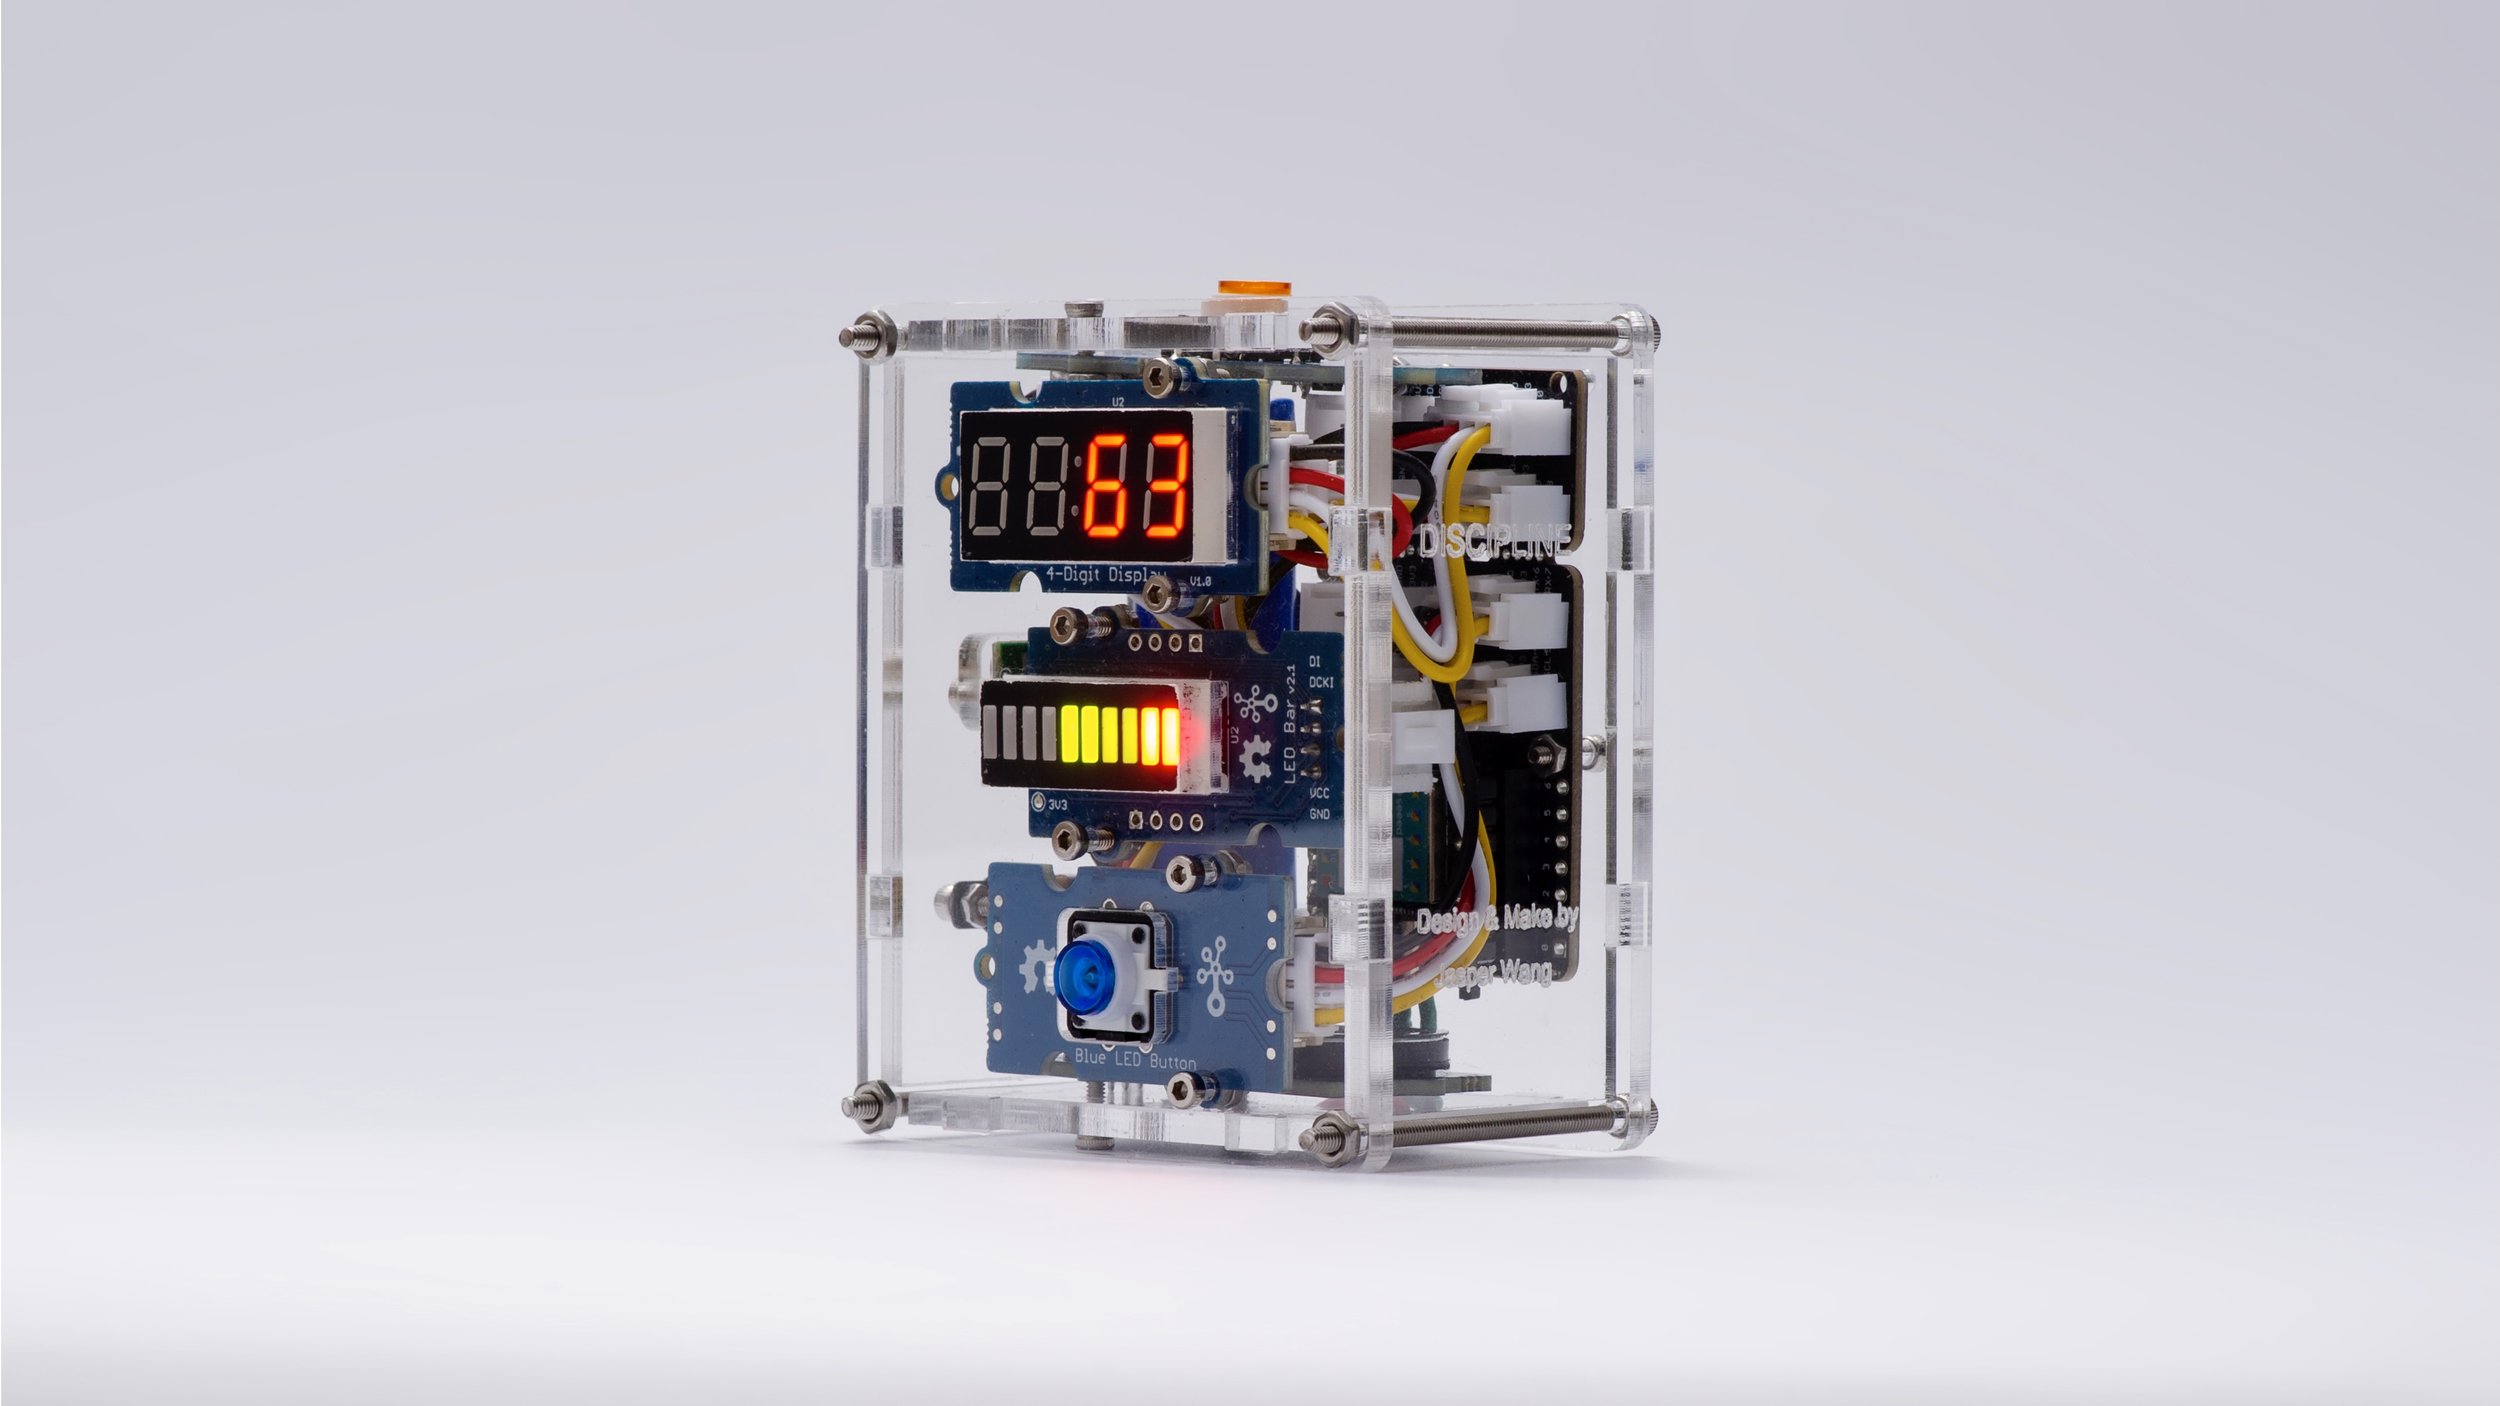
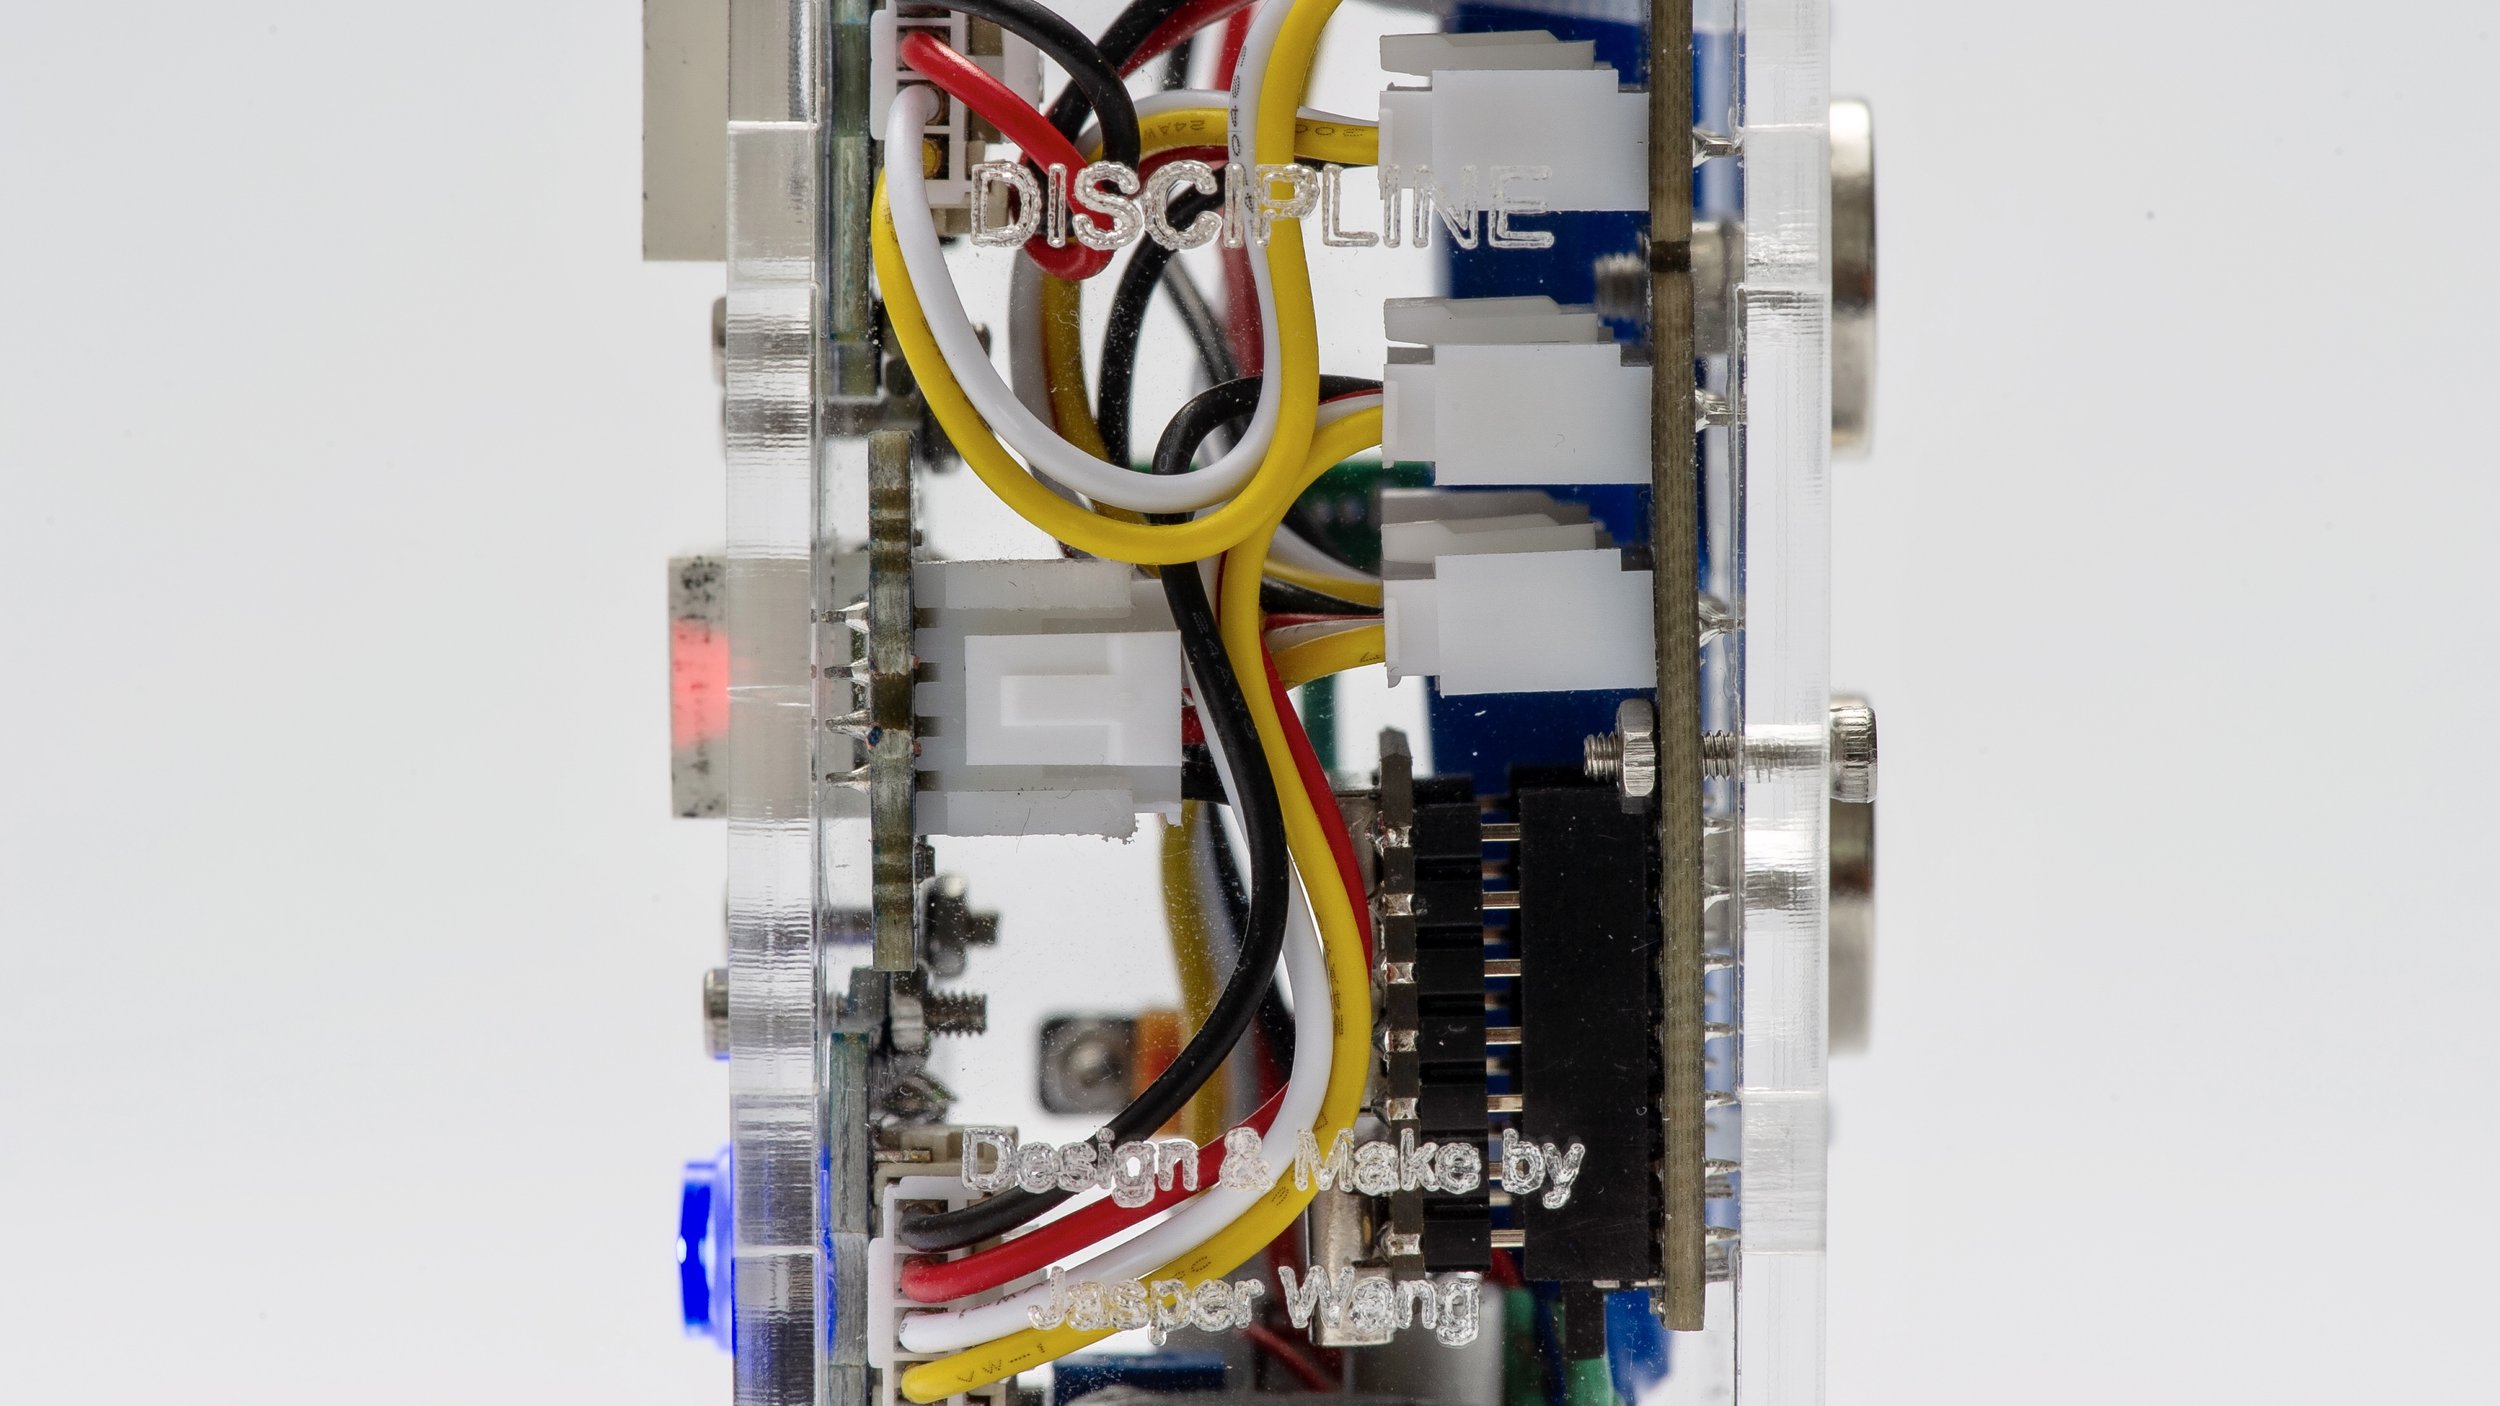
Its shell uses transparent acrylic so that the inside of the electronic components and wiring are revealed, which highlights the aesthetics of electronic products. Through laser cutting after splicing, all the original internal parts are in an orderly and compact placement in the most appropriate location. Electronic parts are fixed by screws, tensioning straps so that the authentic overall adds a touch of retro industrial atmosphere.
Discipline is an interpretation of the Maker’s spirit by the designer.
Design and make / Jasper Wang
Sponsor / Seeed
Date / 2021
Scenarios

Interacte at any sight.
Discipline‘s size can be easily attached to most of the equipment in the gym.

Rest with concentration.
Discipline allows you to rest without distractions from the environment.

Discipline is the bridge between goals and accomplishment.
By Jim Rohn
how to make it?
How do I build this functional prototype in 2 weeks?
How did I come up with this idea?
How did I choose and get the right components?
How did I program it to step by step?
How did I design the look and how did I model and fabricate it?
How did I use it in real-life practice?
How did I get this idea?
I have been physically thin since I was a child and graduated from high school with a height of 179 but only 55 kg, as a result.
However, as I got older, I started to hate being called skinny. I saw a Chinese medicine doctor who said I was born with a weak spleen and stomach and there was no way I could grow as strong as a normal boy, but I didn't believe it.
I started to systematically train for strength when I returned to China in 2020. After a year, I started to gain weight and my muscle tone became visible.

Although it took me a few years to make the progress, but I know that I am still “Skinny”, the road to fitness is a long way, I must continue to break through myself and fight for more progress space.

I hope to get more progress by increasing the intensity of my training. One of the effective ways is to control the amount of time spent between training reps.

“Muscles use specific energy systems for very short-duration or high-force activities. The rest periods between sets of resistance training can be changed to achieve certain goals, such as strength or weight loss.”

For me, Bulking (Muscle gain) is my top priority. So the interval time should be counted from 30secs to 2 mins.
products
In order to strictly and precisely control the time, of course, we will need a clock or a timer. And it is never too hard to find a tool to count time. The easiest way is to use our phone, we take it with us almost anytime. Every smartphone comes with a counter app.

Similar to smart phones, we can also wear a sport watch to count during the workout.

In addition to this, there are also more professional timing devices in the market.
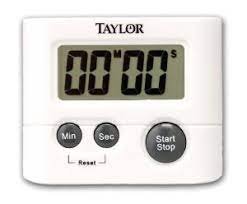
I also find a nice interval time counter in the us market. It looks great. But the remote doesn’t make any sense to me, use a remote to control a timer? Too Overkill.


Smart devices VS Timer
Both smart devices and timers can perform timing tasks, but still, they perform in two different ways. Generally, the smart device is more accessible, while carrying a timer might be a little extra burden, but timer still does has its advantages.

The most drawback form smart devices are that they distract the attention of the user. Smart devices are constantly popping up with new message notifications, causing users to be guided to other apps while using the timer function, resulting in distraction and less focus.

Therefore, my goal is to design a functional timer, which has a good looking, and also easy to use.
design goals
Small, portable, compact
Fully functional as a timer
Simple UI design
Clear interaction flow
Cool
interaction flow
I want to design the simplest interaction that minimizes the number of steps of operation.

Find the Materials
After I had this idea in my mind , I begin to think about the electronics I need.
A small microcontroller
Two pushbuttons
One display screen
One battery
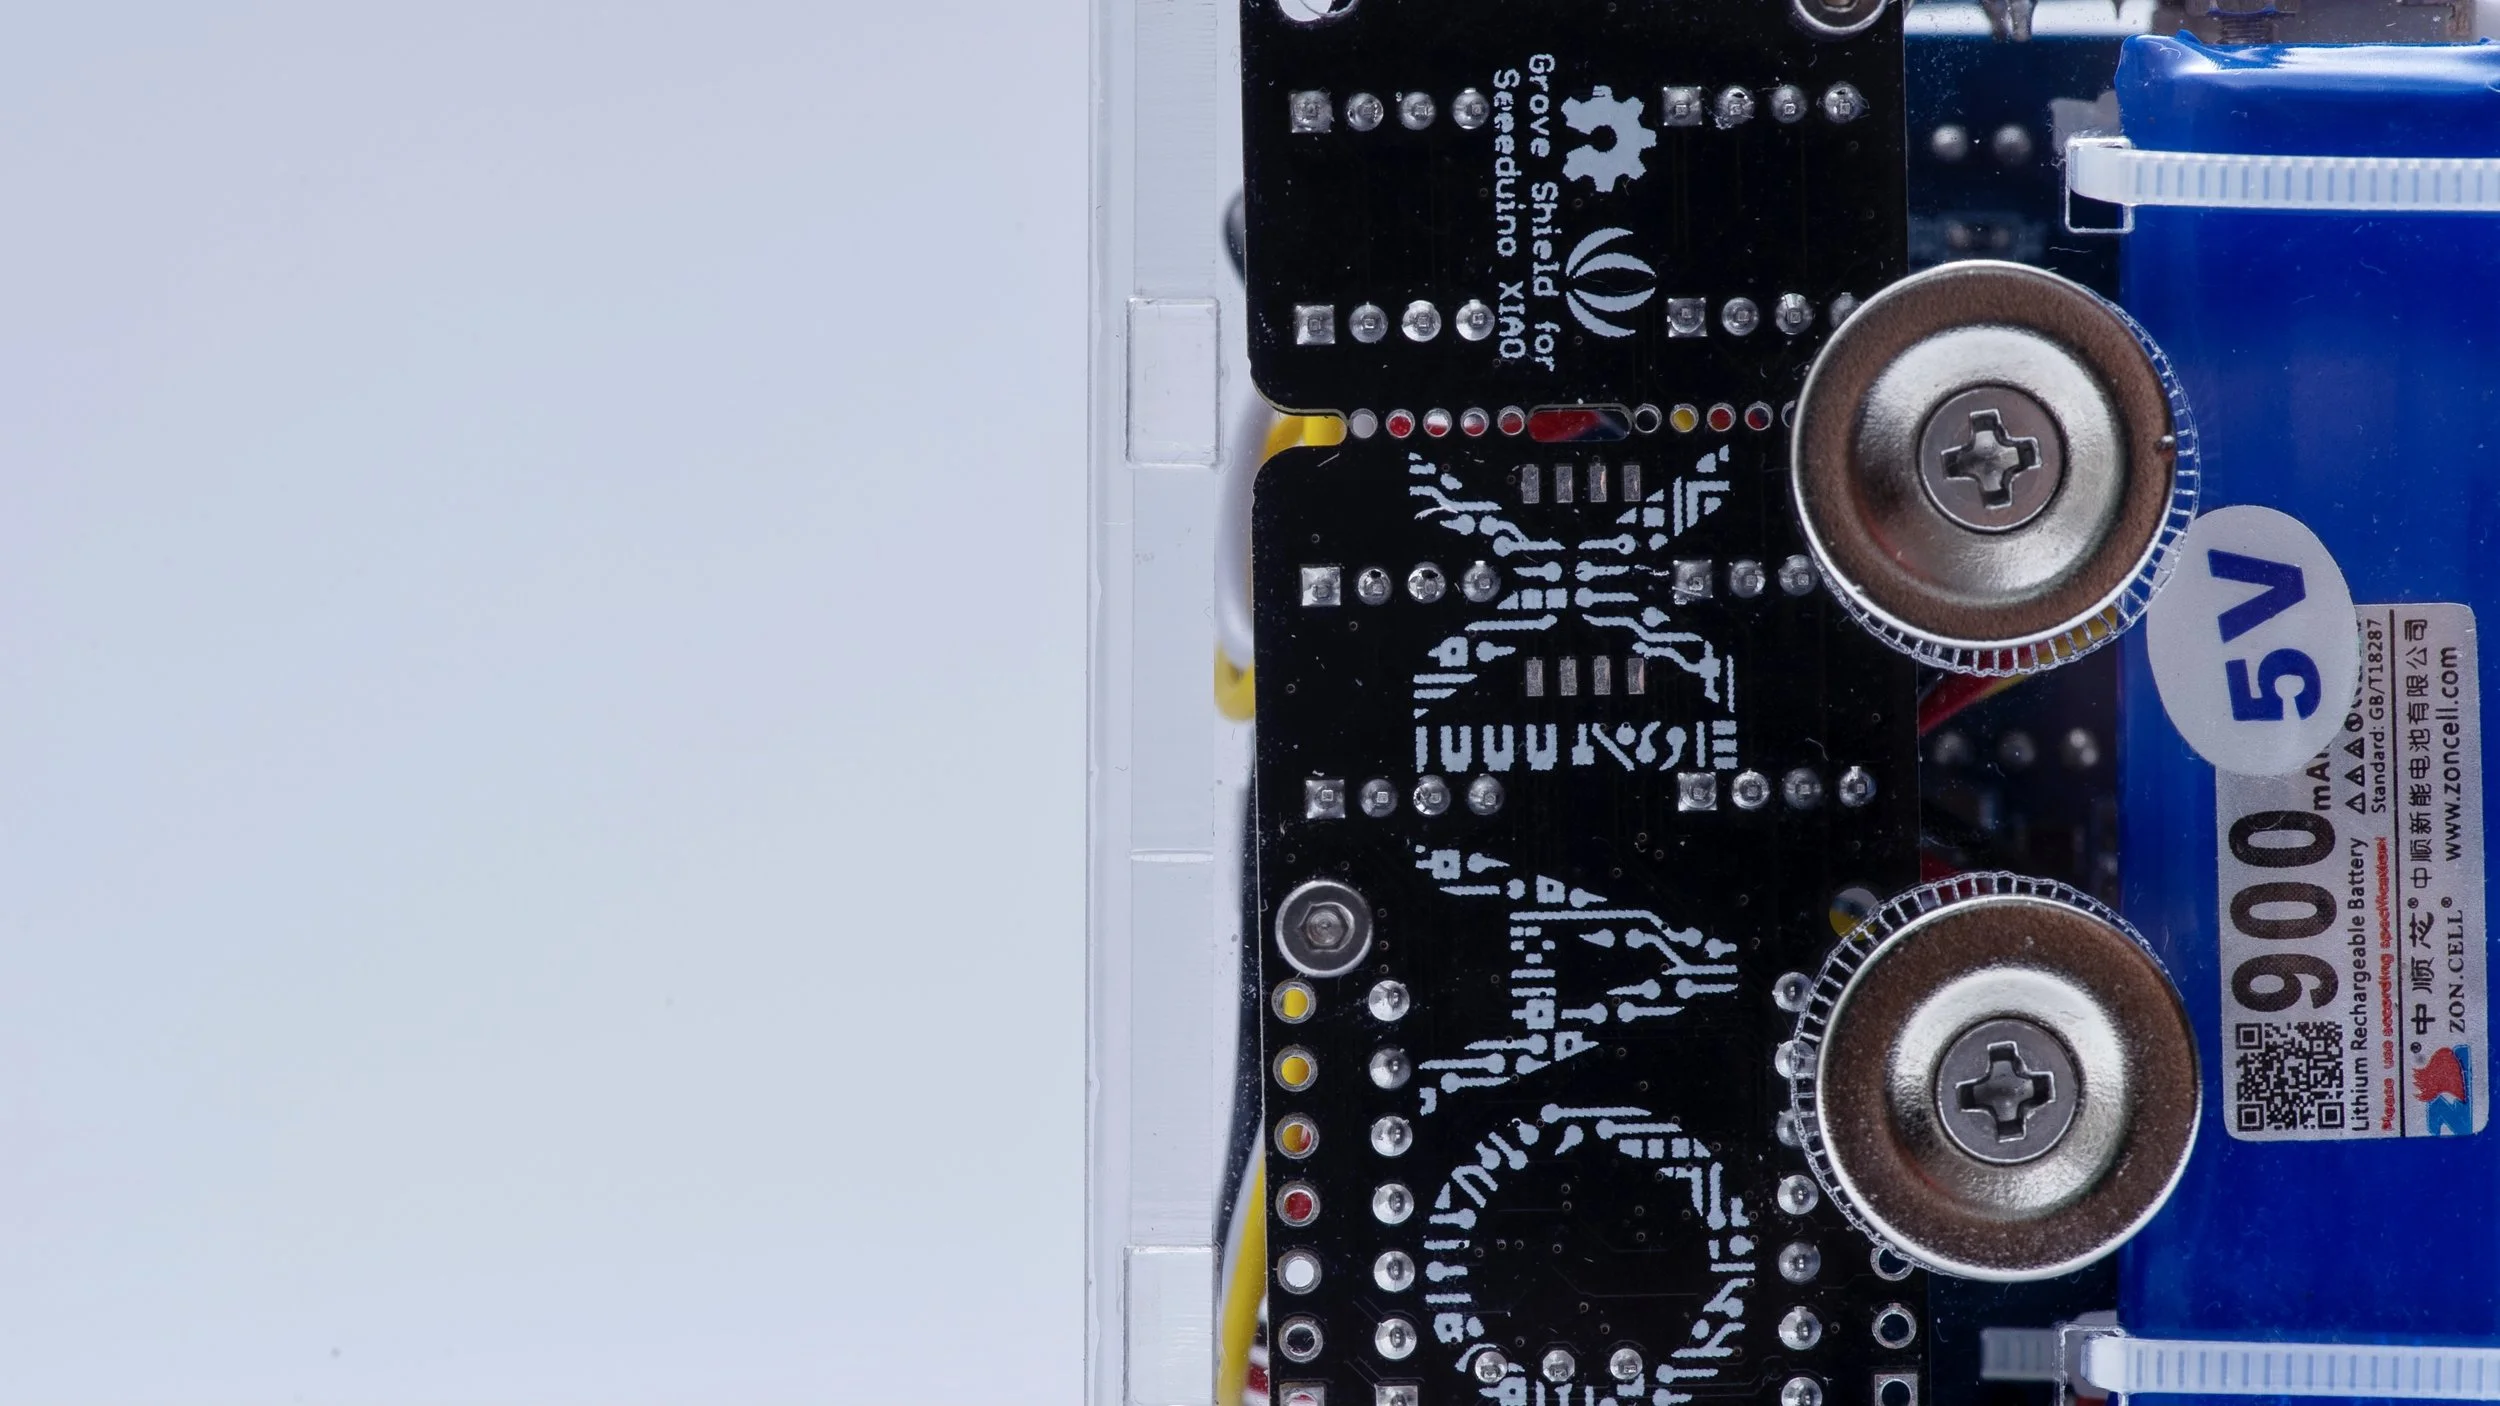
I ended up choosing Seeed’s Product. Their new product - XIAO, is small but powerful.


Here is the final list for the electronics:
Seeeduino Xiao
Grove LED button - Blue
Grove LED button - Yellow
Grove 4 Digit Display
Grove LED Bar
Grove Speaker
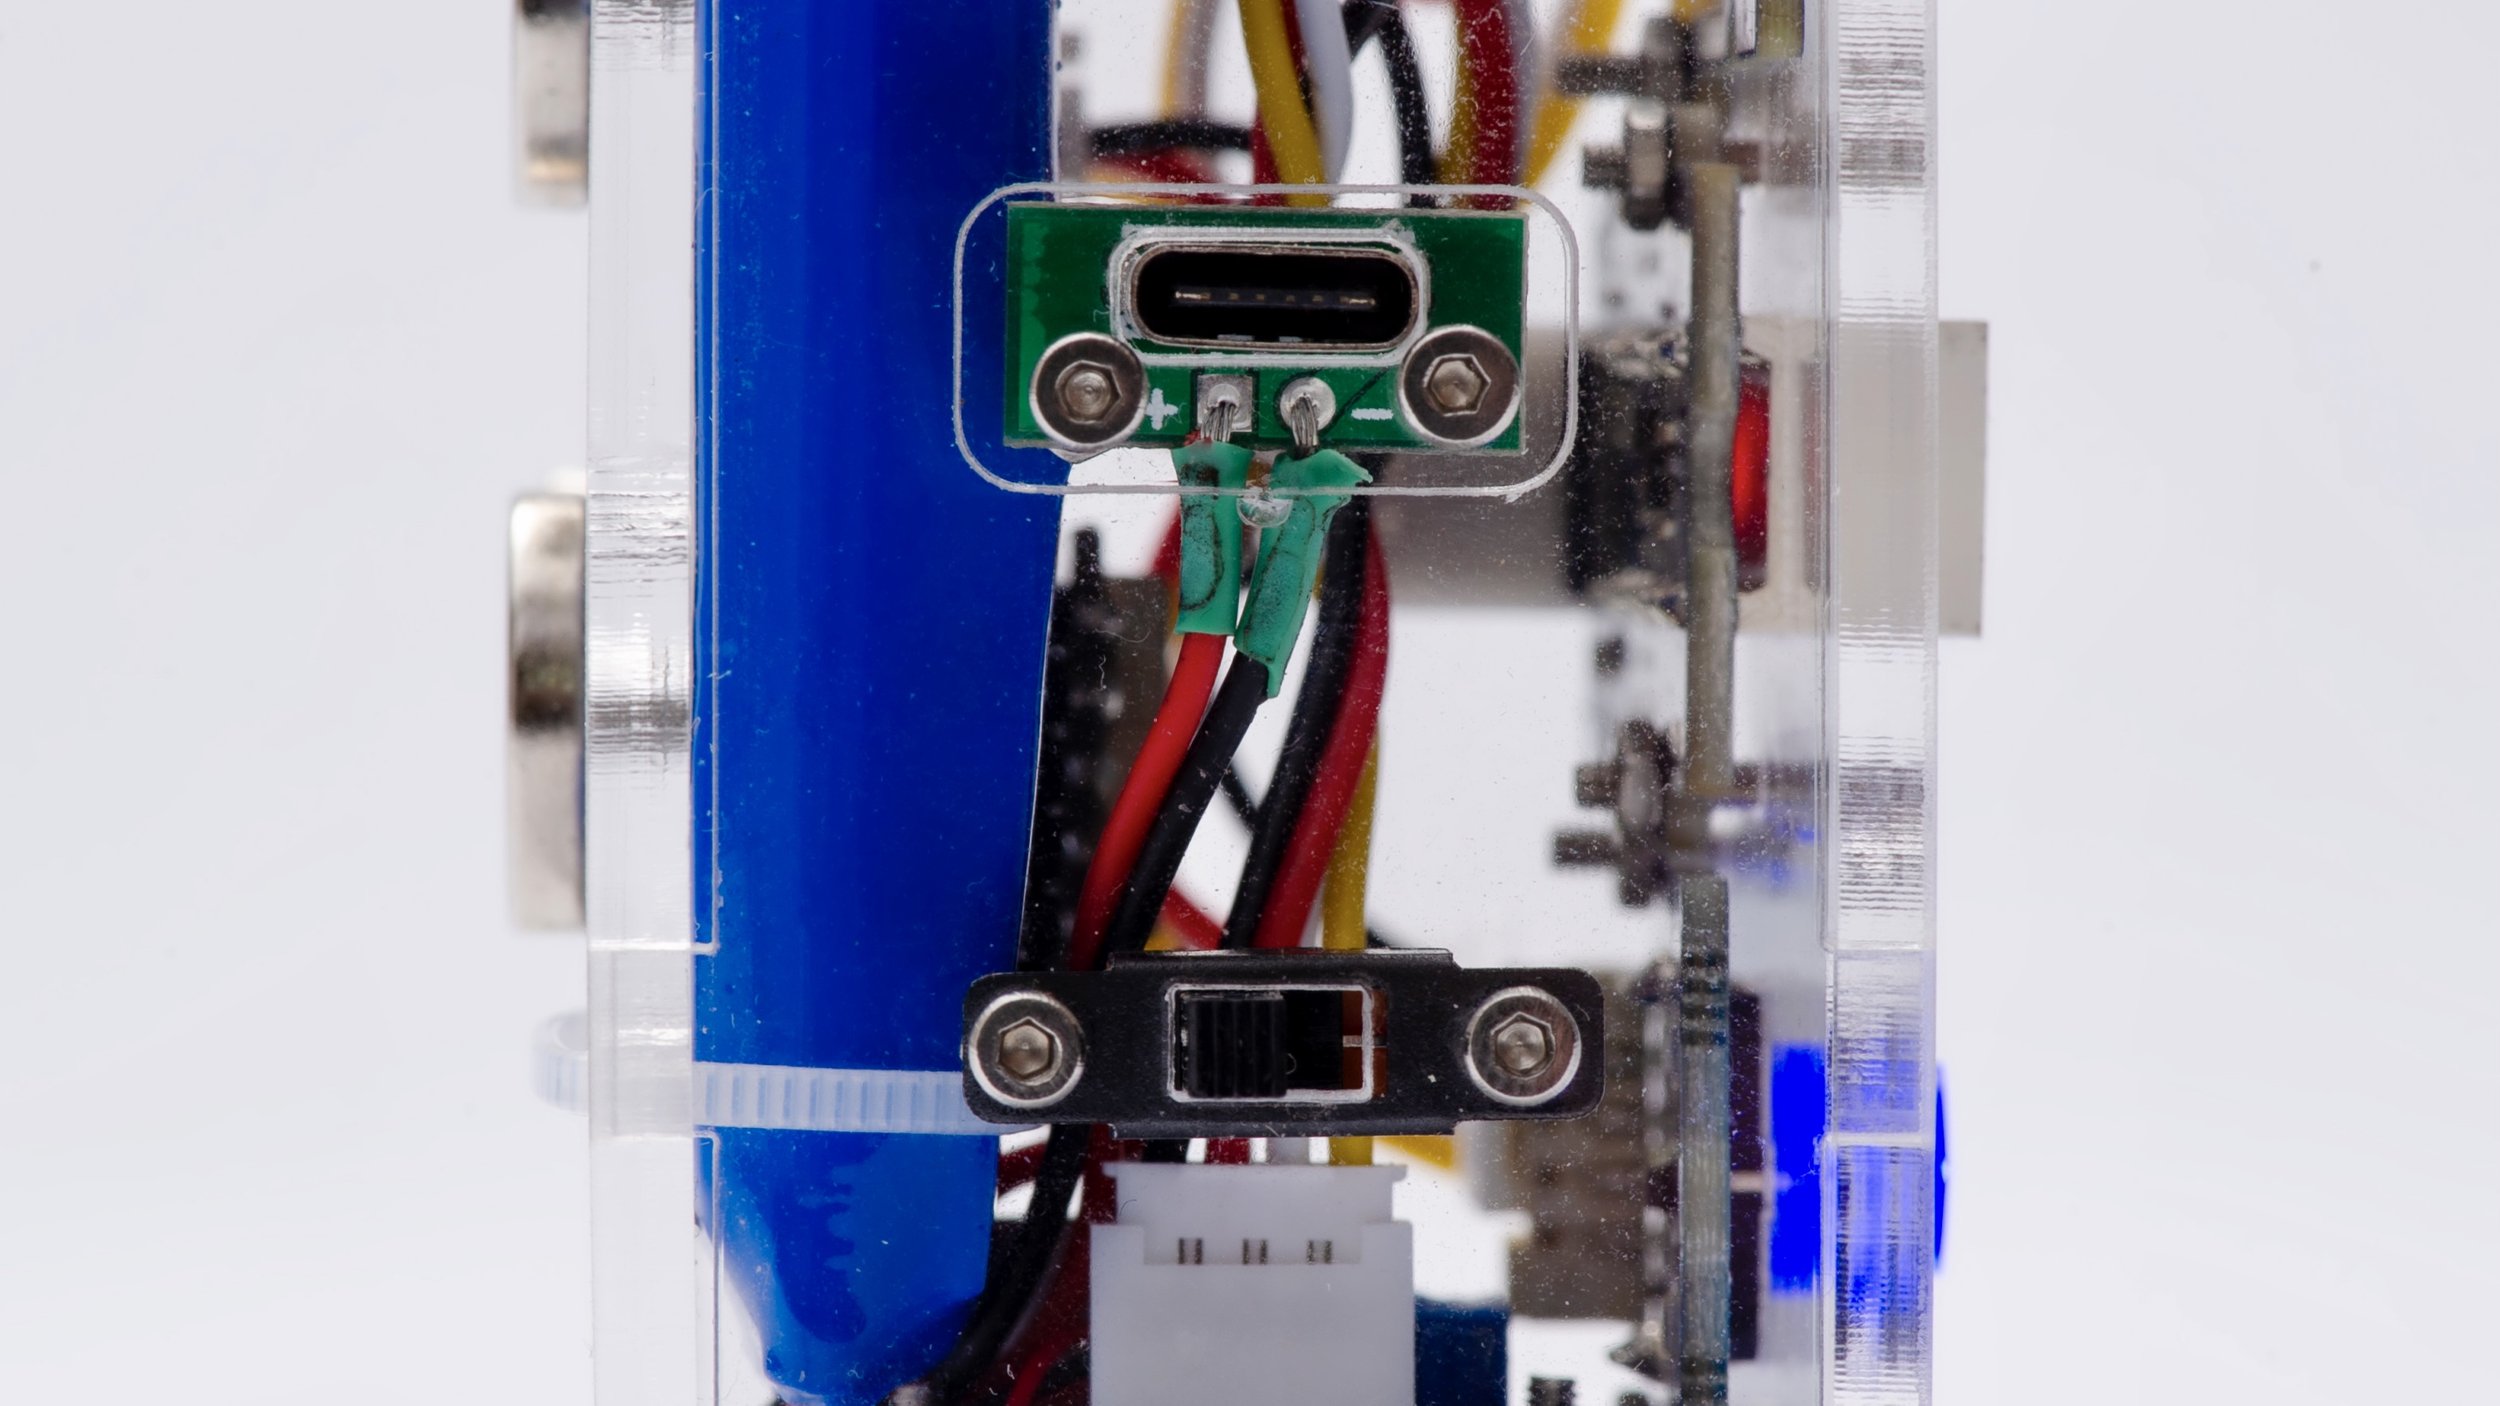
P Switch
5v Lipo Rechargeable Battery
Type-C Terminal
Grove Wires
Why do I choose to use Grove connector?
Grove is a modular, standardized connector prototyping system. Grove takes a building block approach to assembling electronics. Compared to the jumper or solder based system, it is easier to connect, experiment and build and simplifies the learning system, but not to the point where it becomes dumbed down.
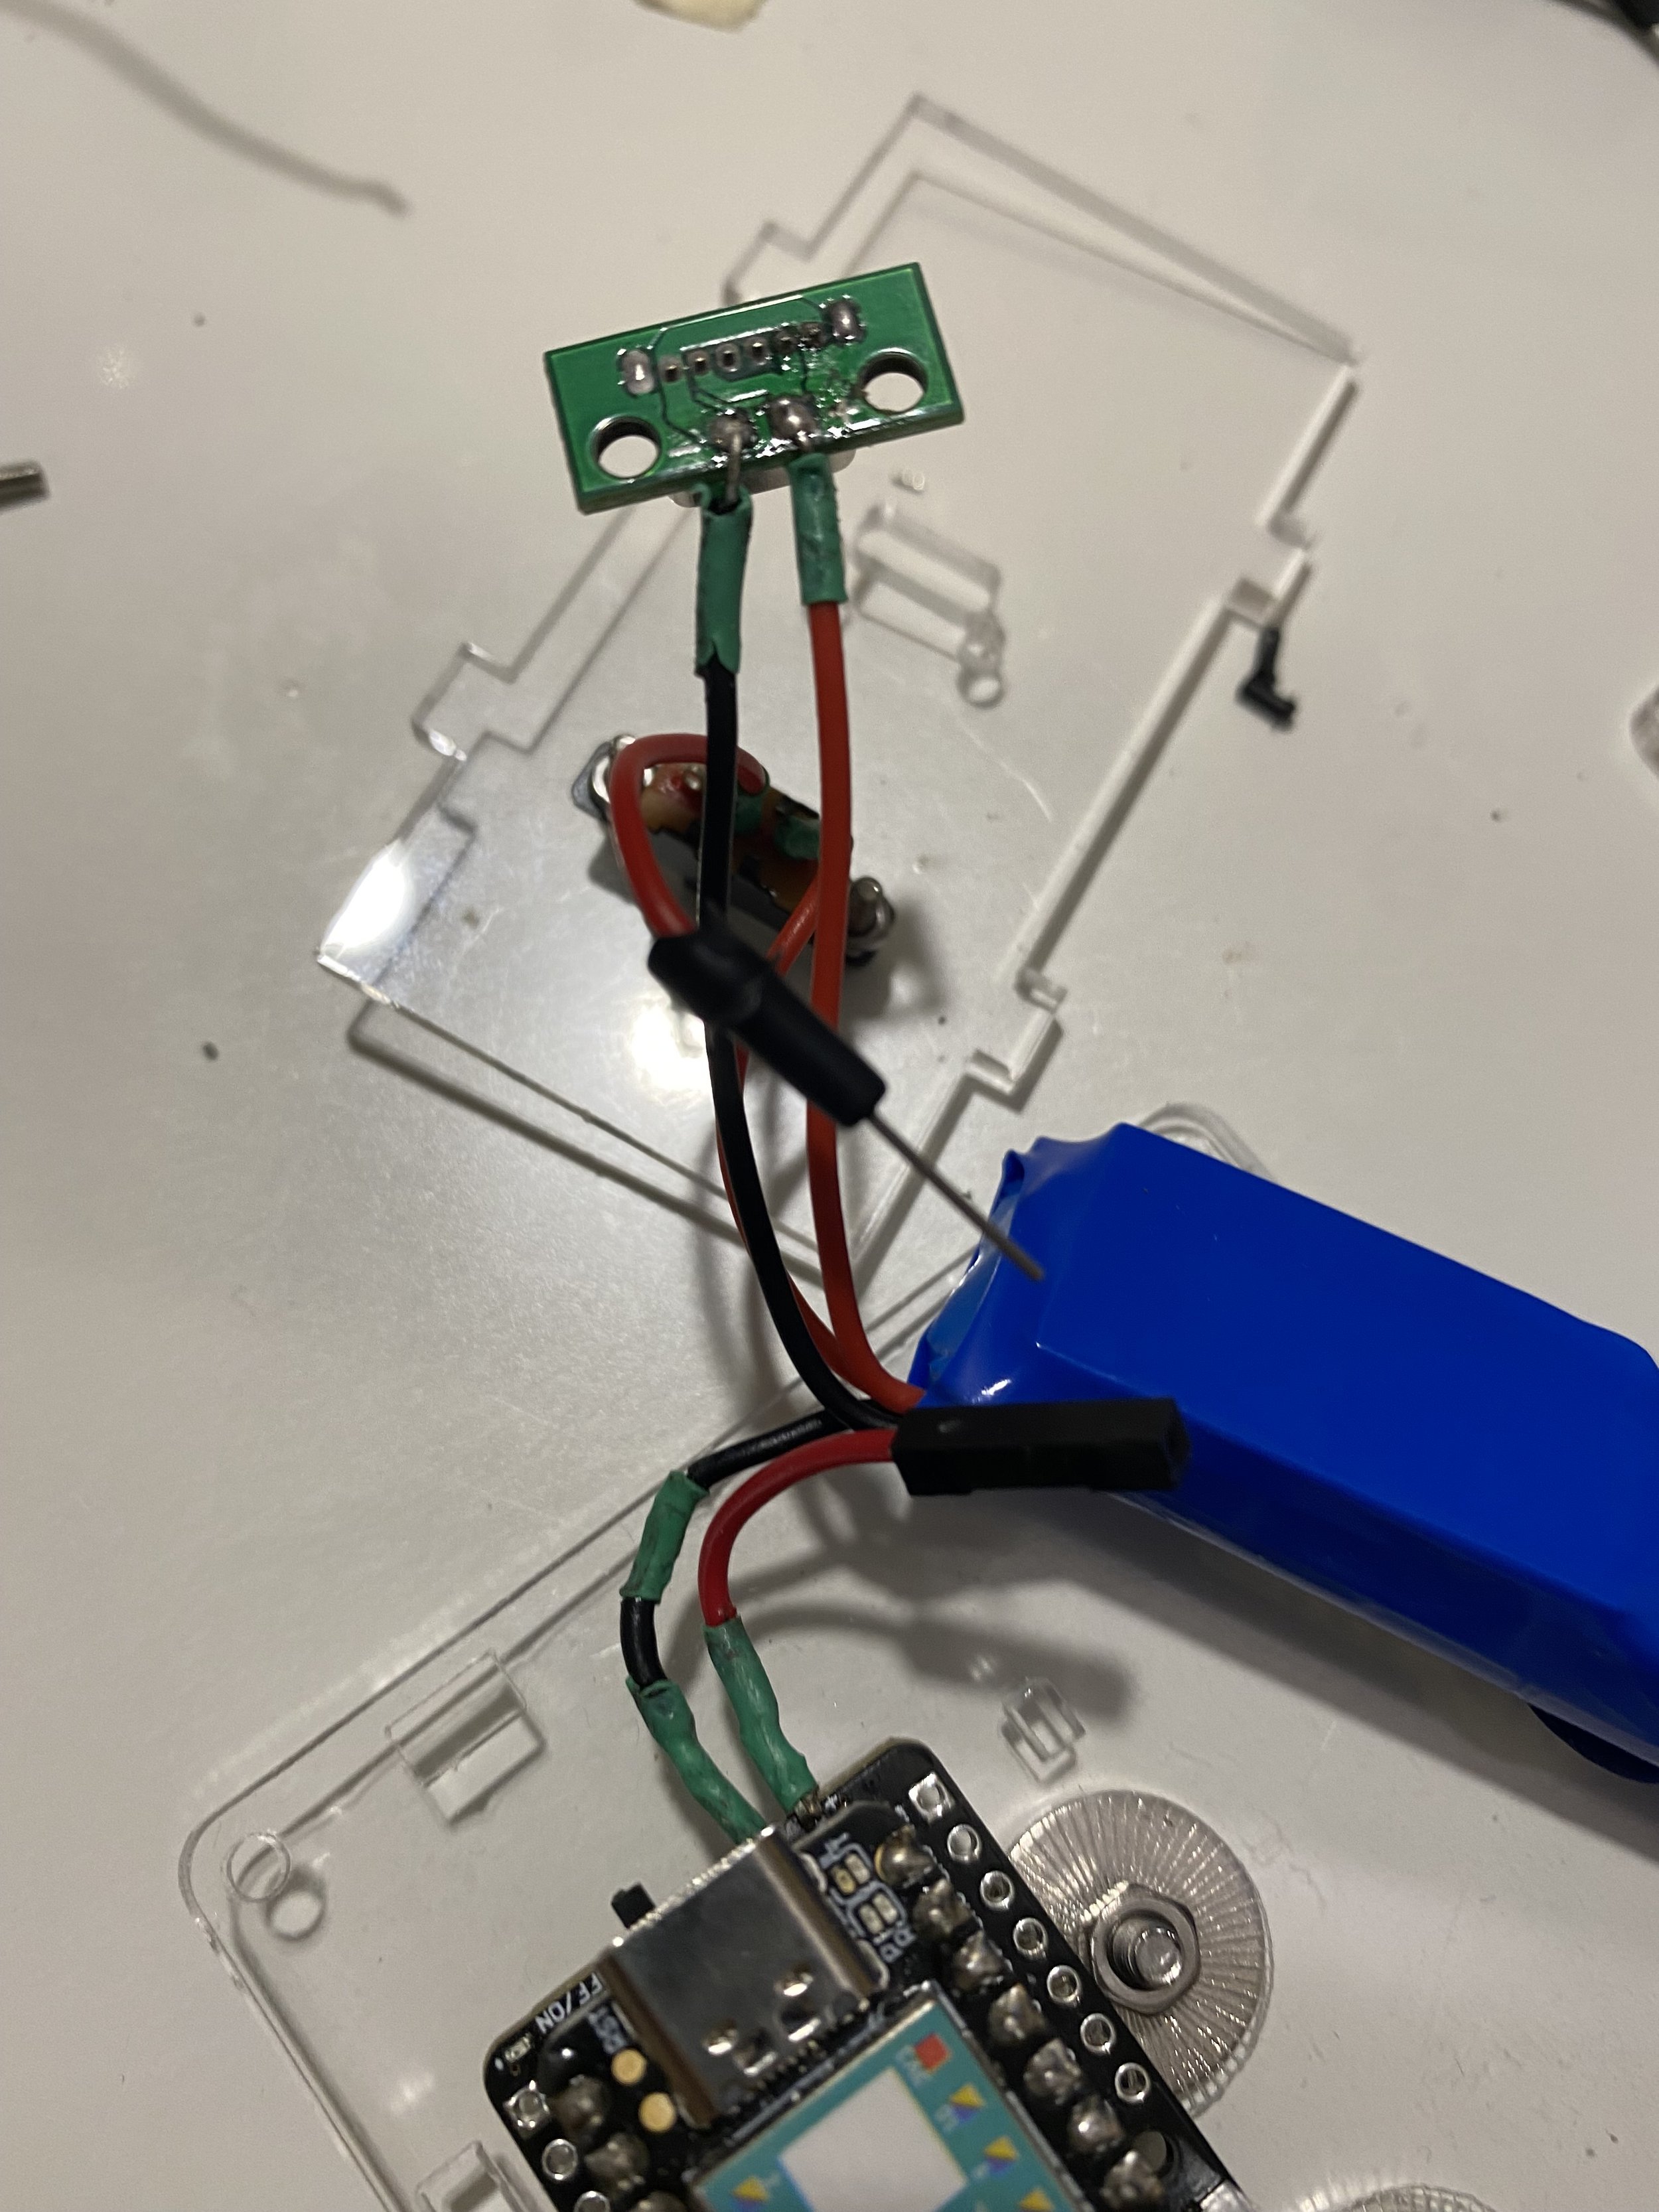
Grove allows me to quickly connect all the electronics without further soldering. The connections are clean and stable, it greatly reduces the physical errors that can occur during the soldering.

circuit testing/programming
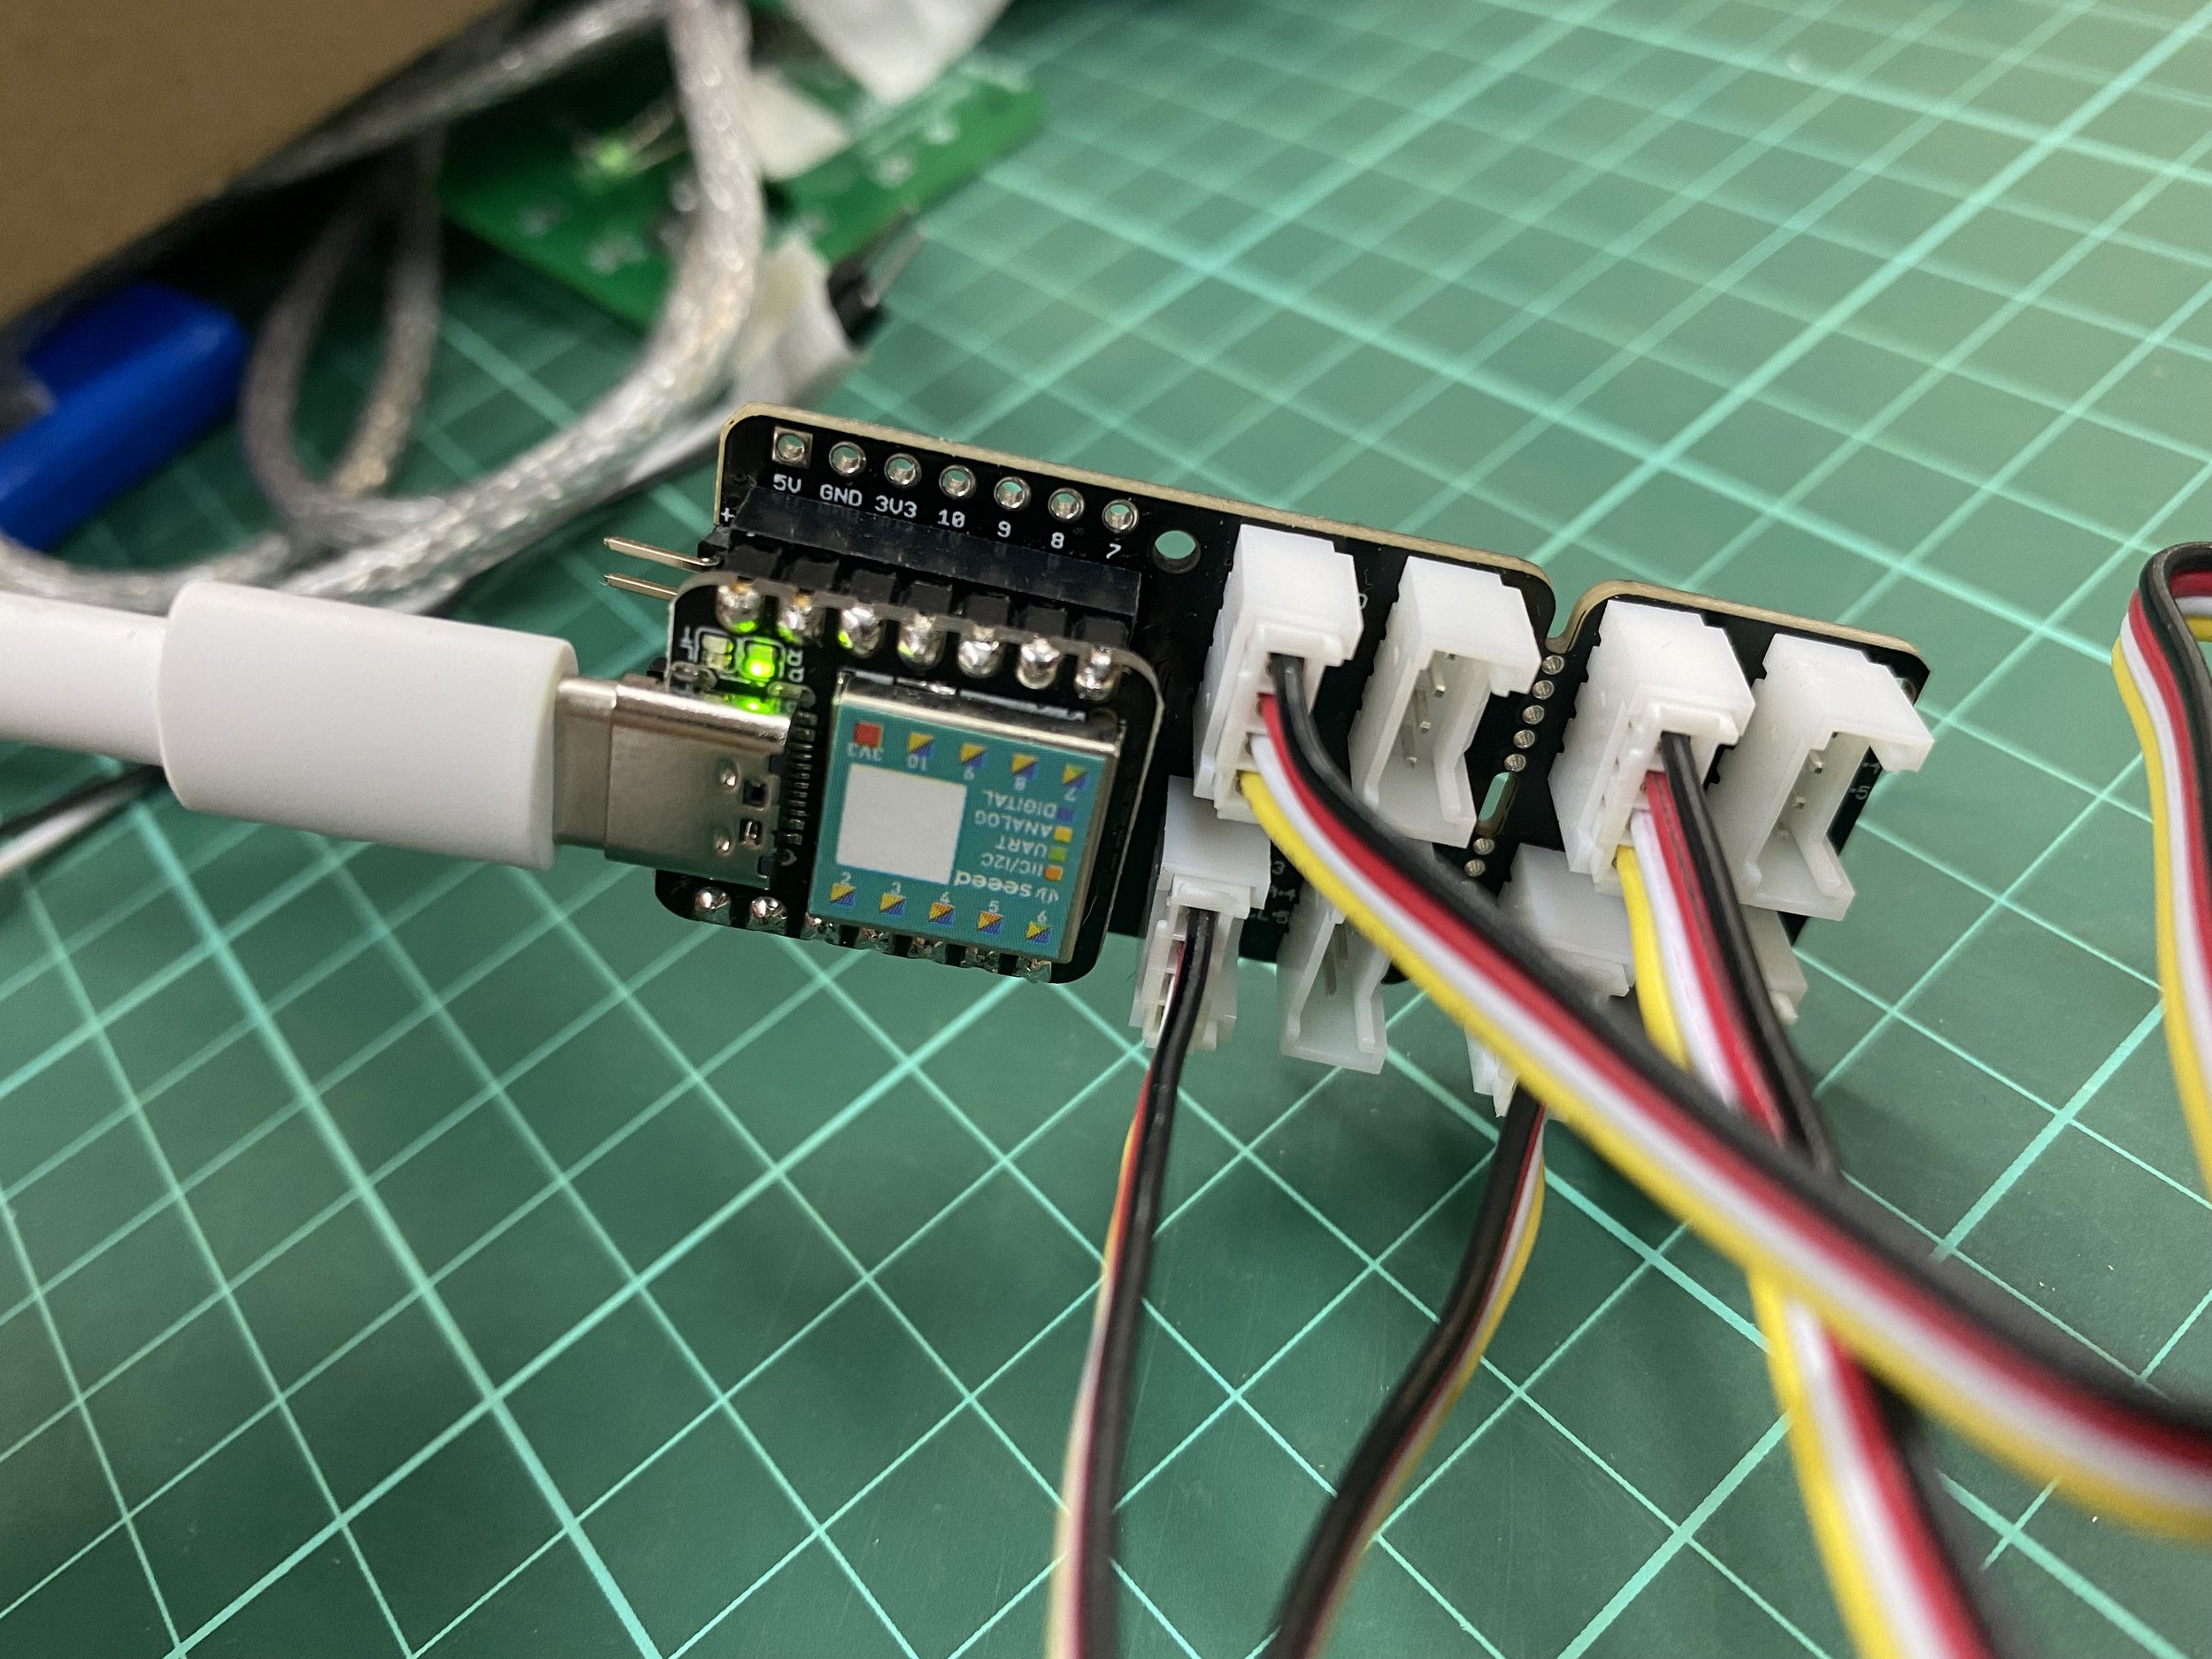
Step 1 - Testing the Seeeduino XIAO
Xiao is compatible with Arduino IDE, so I can seamlessly program XIAO as I normally do with other Arduino boards.
I tested XIAO with the Blink program. But first, I need to install the board inside the board manager. Then I find the Seeeduino XIAO and pick it just like you pick Arduino UNO.


Step 2 - Test the LED buttons
Connect the two LED buttons to the XIAO’s expand board. In this case, they take 4 pins from the XIAO, 2 for the LED lights, 2 for the buttons.
Controlling the 2 LEDs is easy, I just send digital signals or PWM to them. Then I can try on/off or fade effects. See some tutorials below:
However, if you want to achieve this project, you have more Arduino knowledge, like how to use Millis() to control time. If you are confident with it. You can redo the two things associated with LED.
Now, let see how to read the button. The easiest way is just to read a digital input value.
But it is usually useless in real-world practice. We need to really push a button and release the finger to finish one command. So how to deal with this? Since you have already familiar with millis(), it’s time for you to learn debounce.
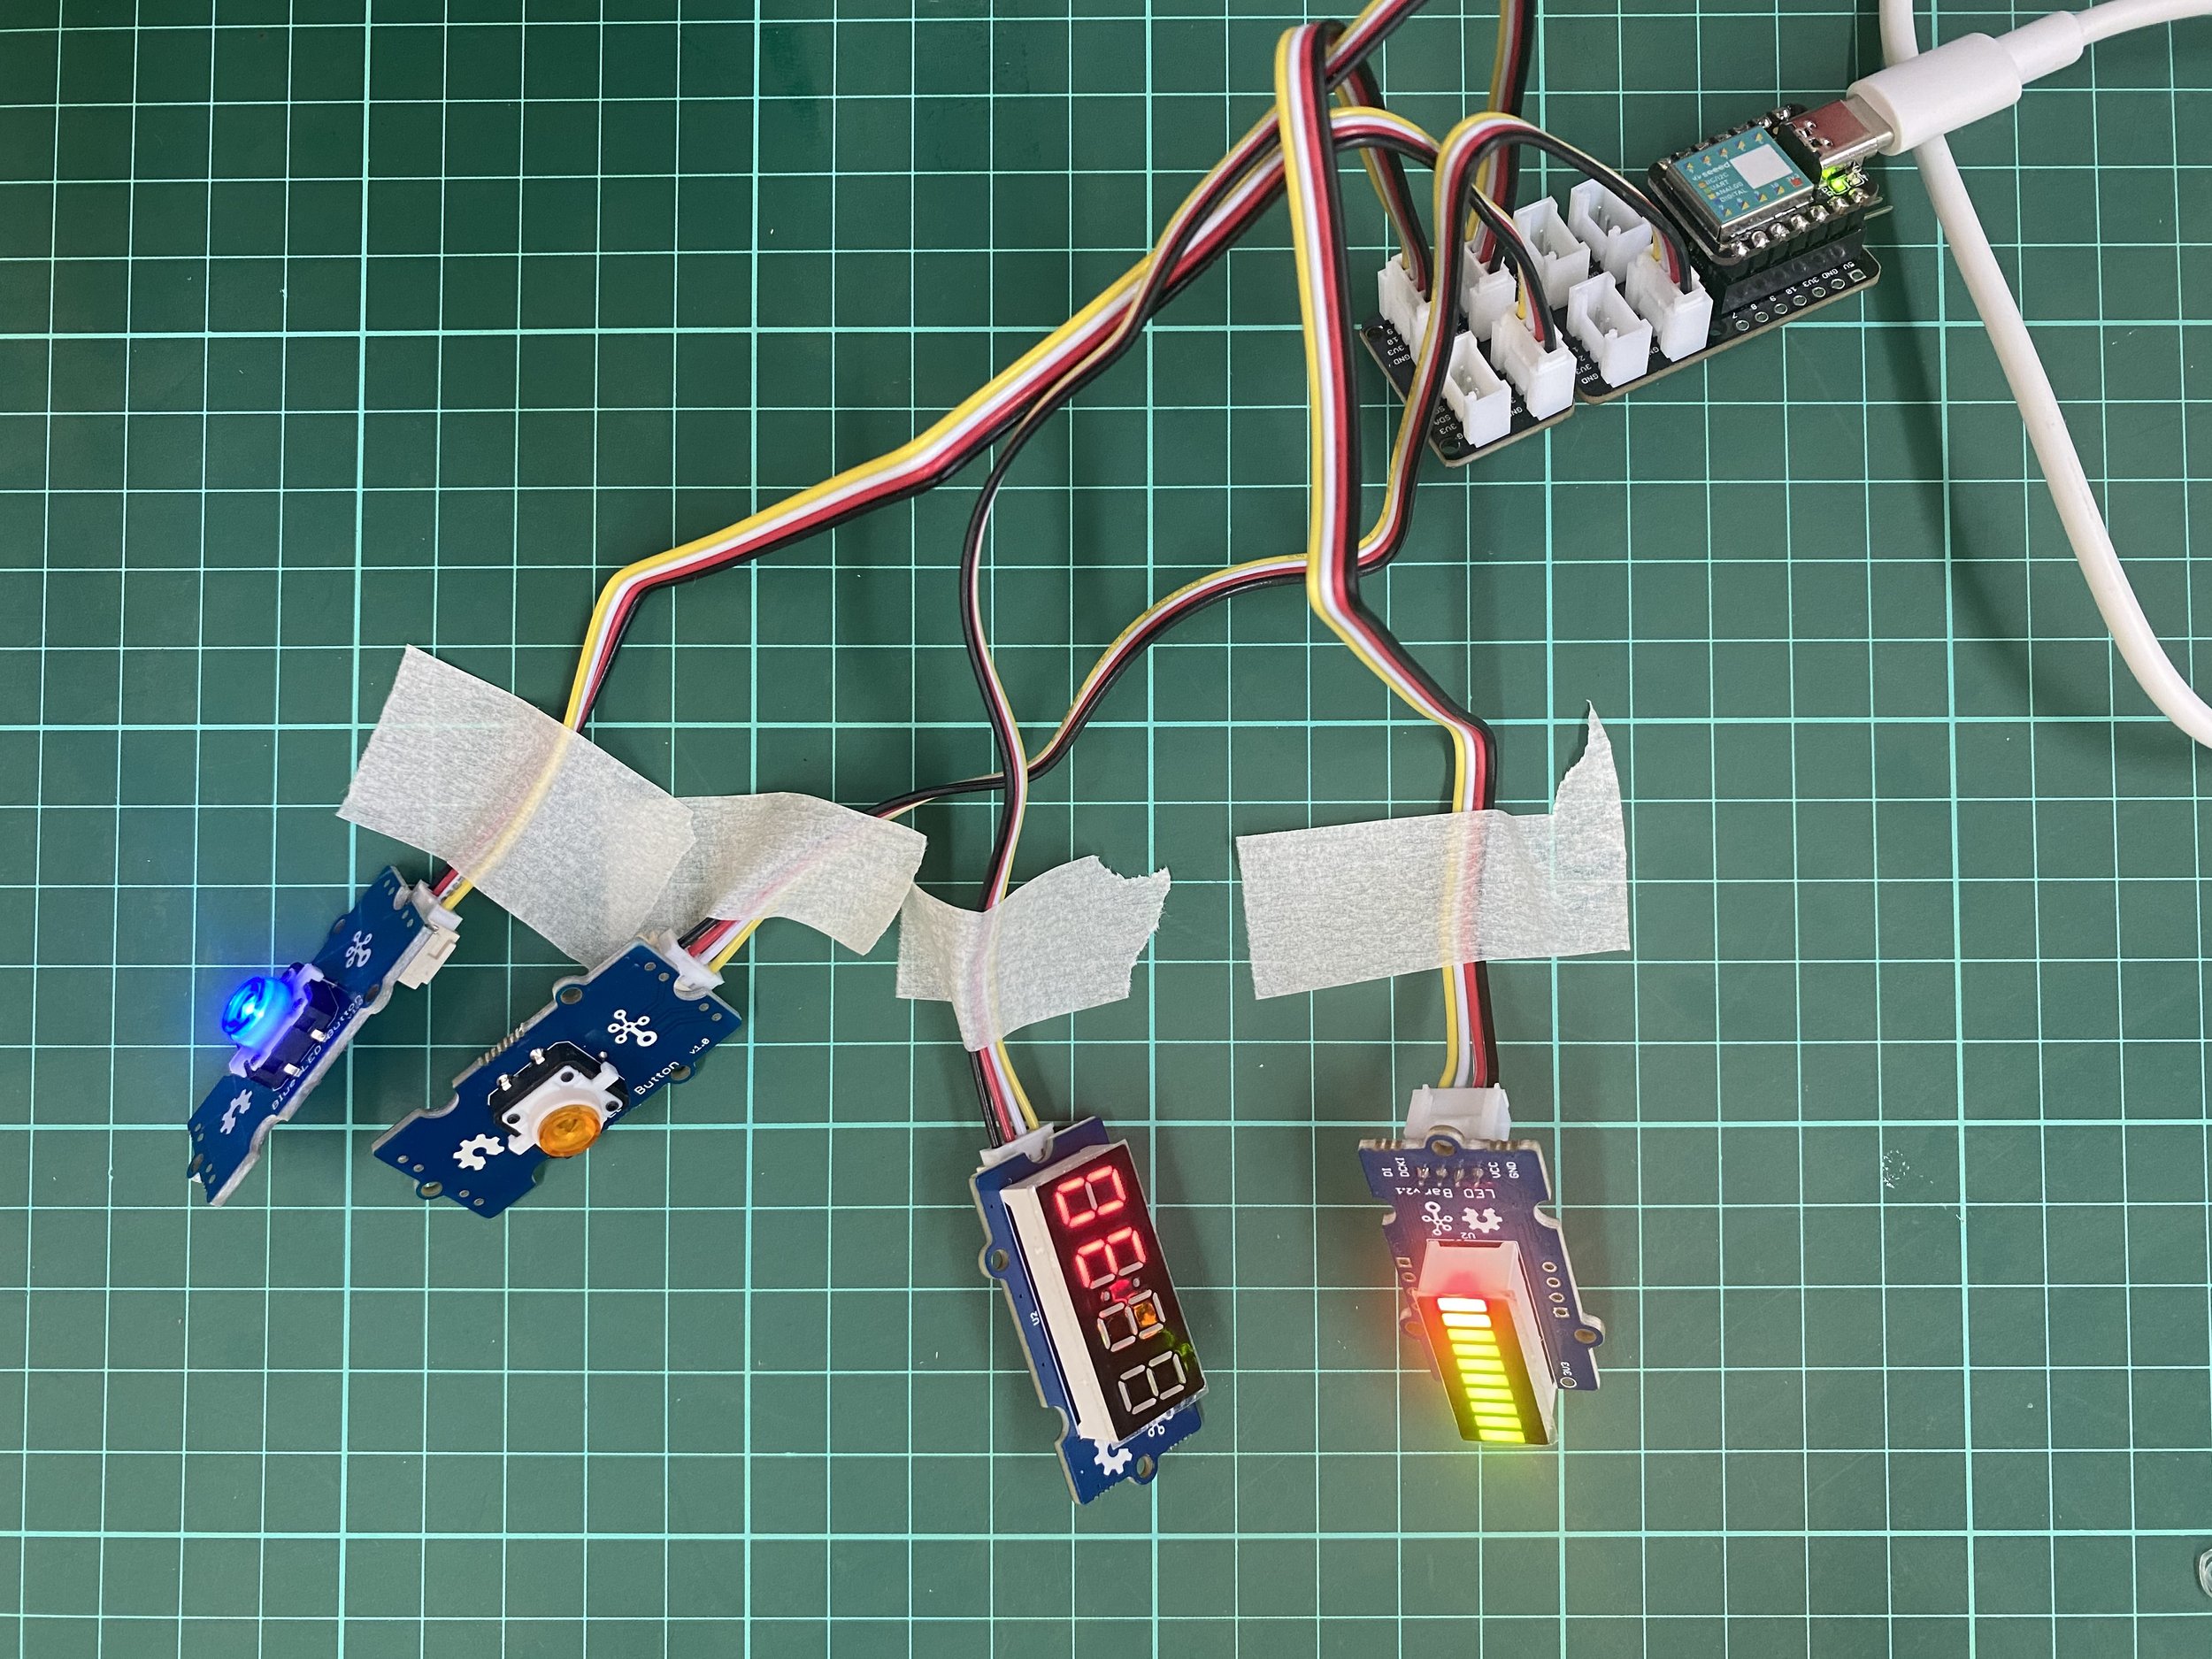
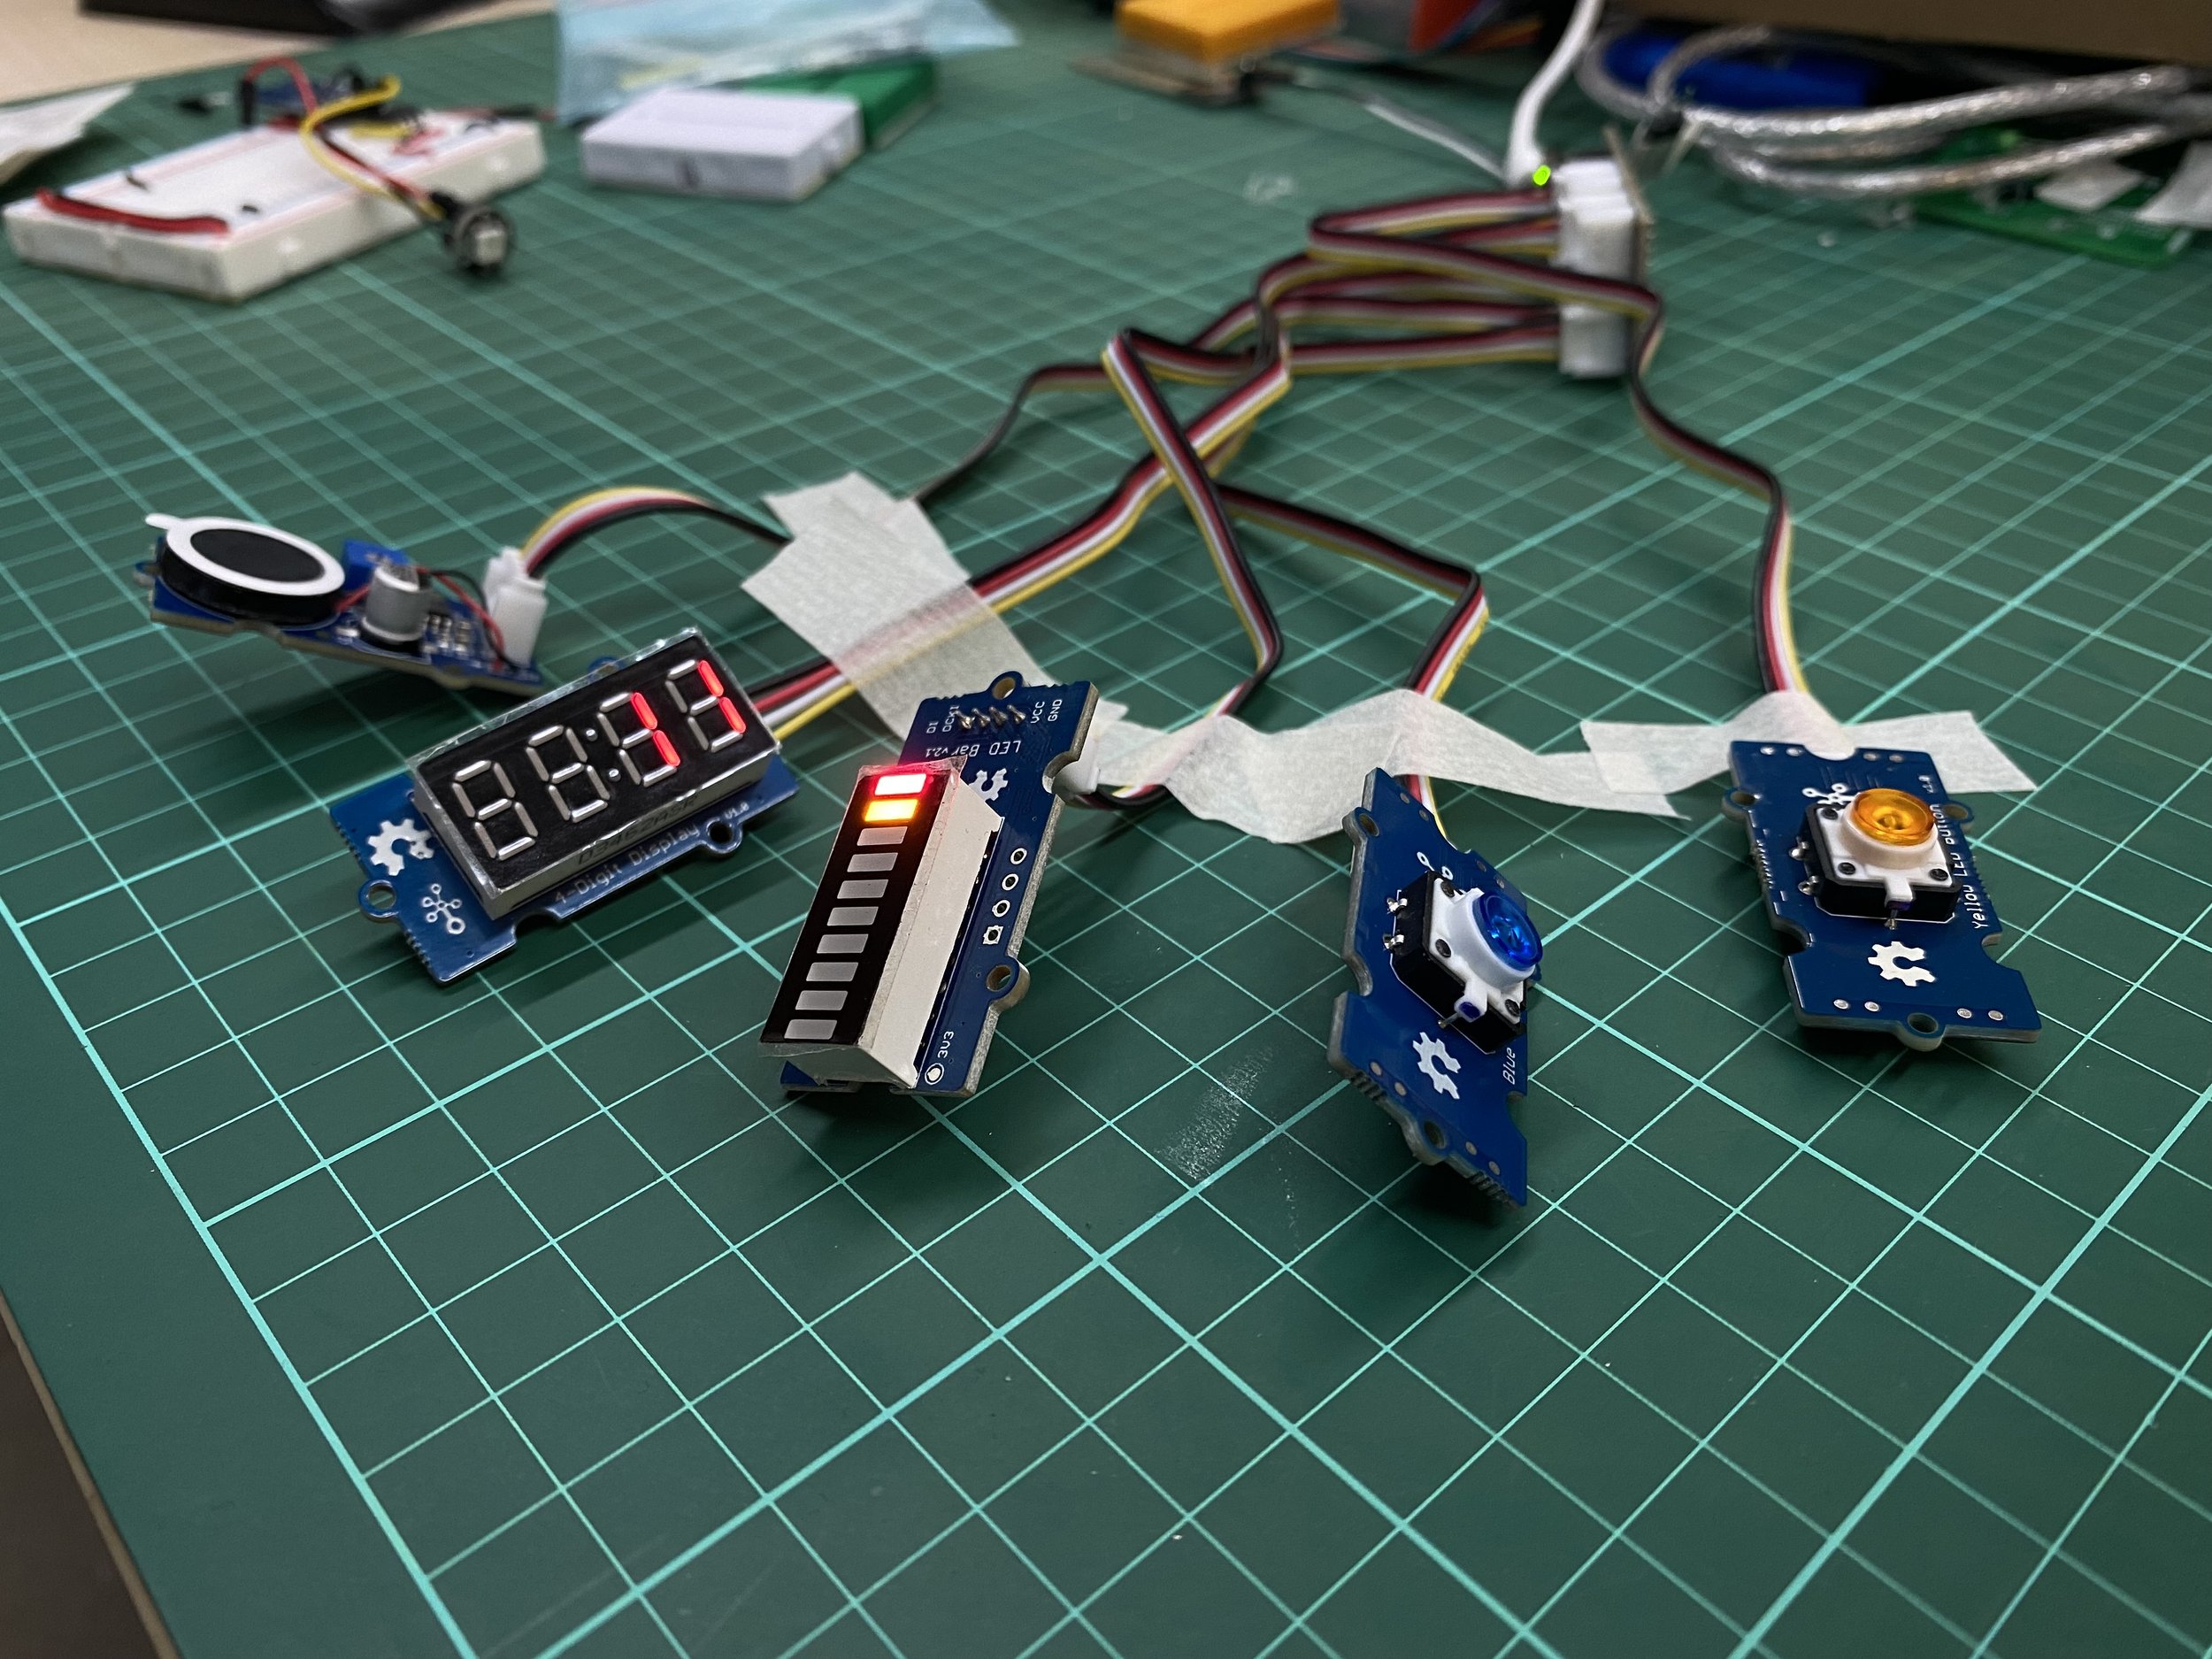
Eventually, I successfully connected the two LED Buttons to the XIAO, set the lighting effect, and read the button state separately. Here is a wiki for this Grove LED Button.

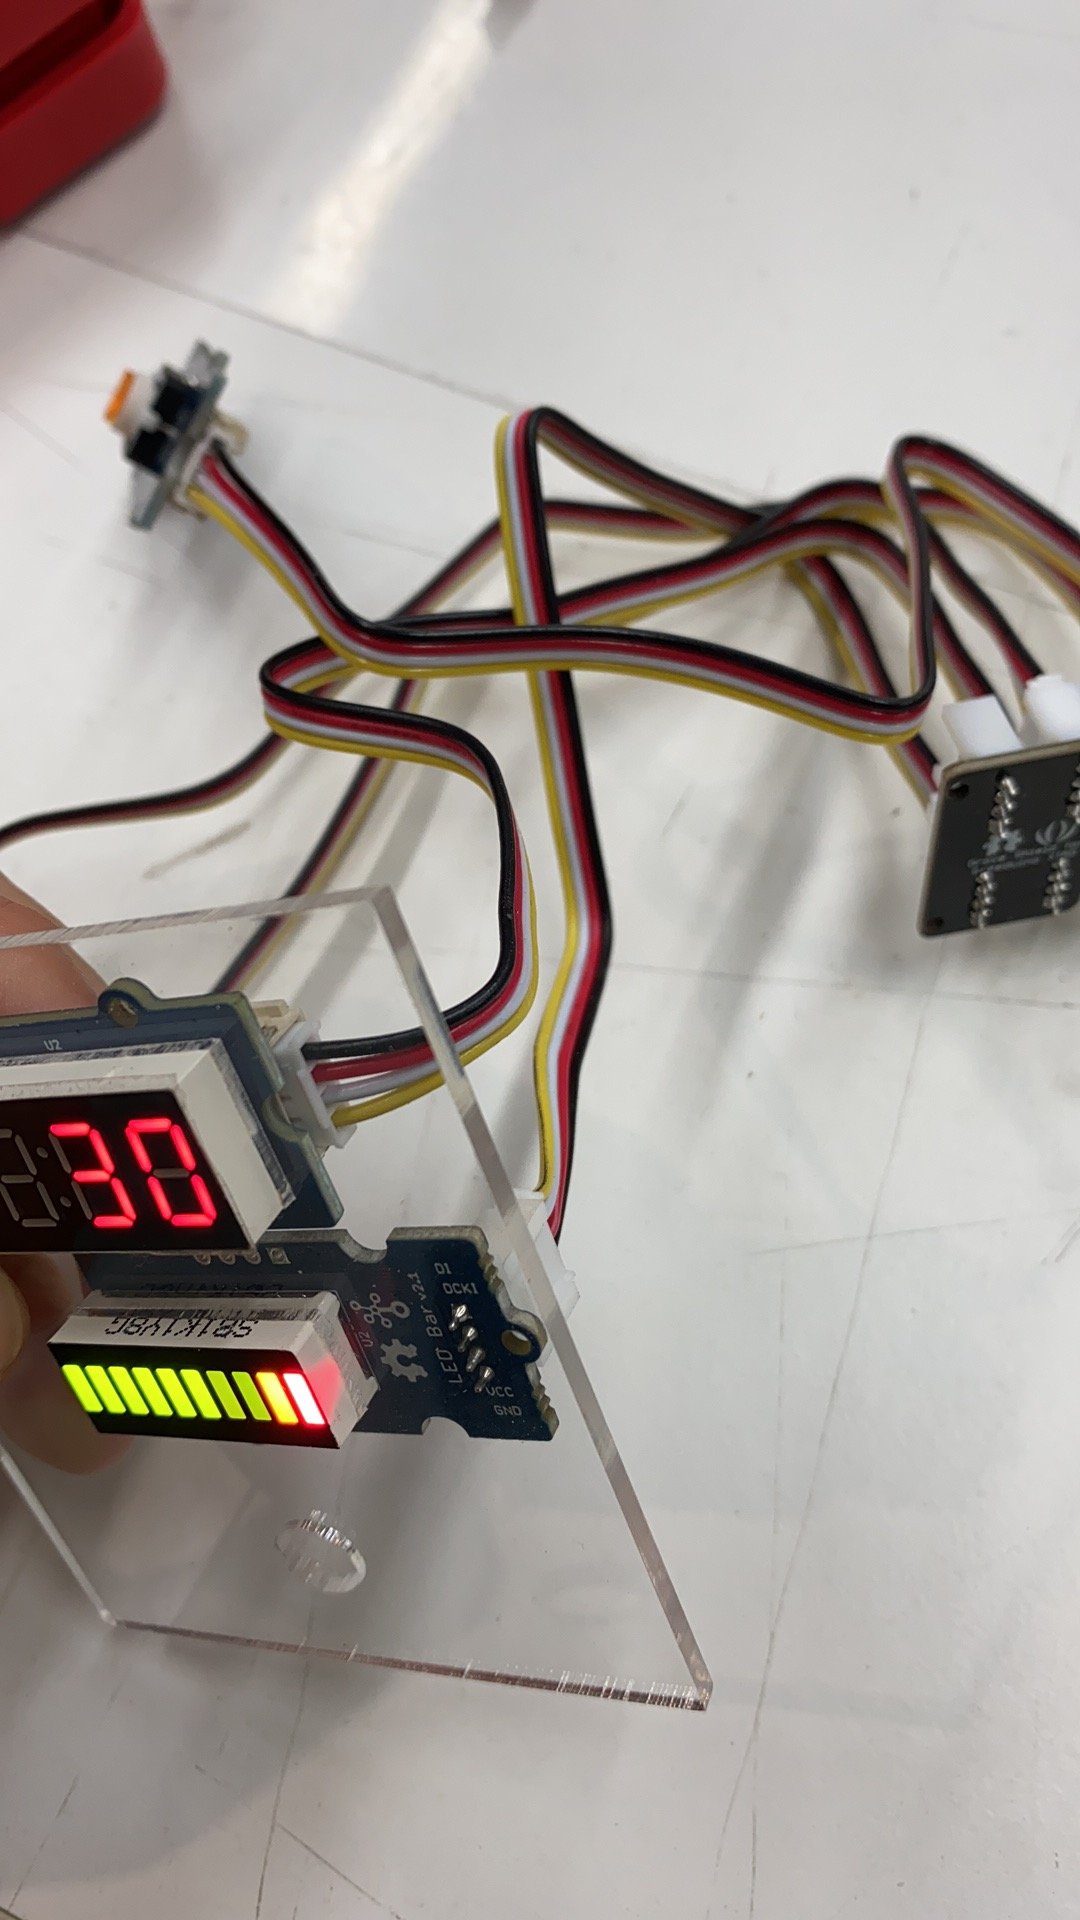
Step 3 - Testing the 4 digit display
The 4 digit display is used to display the time. To use it with XIAO, we need to first install the Grove-4-Digit Display Library and TimerOne Library. Read the full documents below:
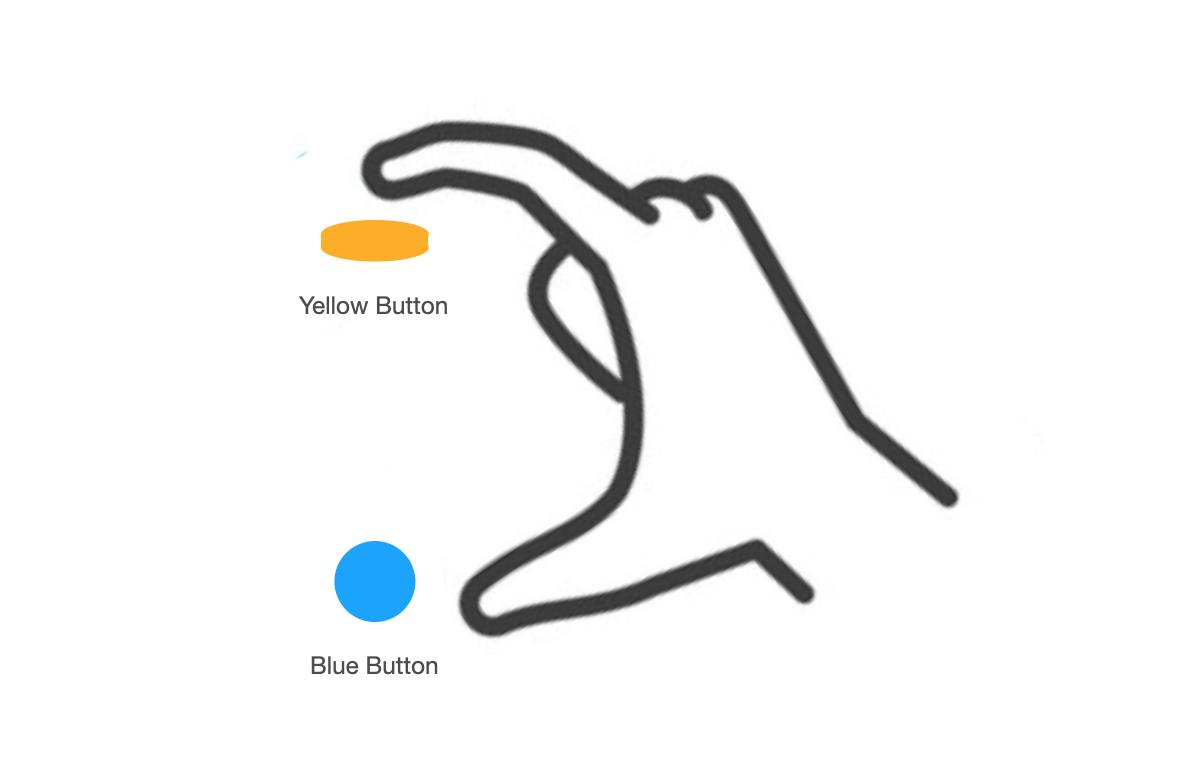
After some playtests, I then use the yellow button to control the time setup, and I use the blue button to start the counting.

To provide a good indication, I did several things for the LEDs. ( Y for Yellow, B for Blue)
When powering it on: Y -> Fade; B -> ON, indicate to pick up a time period.
Press Y to switch timing options: 30s, 60s, 90s, 120s.
Press B to confirm your choice, the timer starts counting down. Y -> OFF; B -> OFF.
Timer ends counting, B -> ON; Y -> OFF forever.

Step 4 - Test the LED Bar
The effect of data visualization graphics will make people receive the message faster than the data alone. So I decided to add an LED bar to represent the counting accordingly. The LED bar has 10 segments, so each segment will represent the corresponding time interval. It’s not hard to achieve this effect dynamic by doing some mathematic in the code. Check the documents of the LED Bar here.

Step 5 - Test the Speaker
Now, we have finished most of the main functions, the last thing is to add some sounds to enrich the interactions. I let the Speaker beep in the following scenarios:
Power boot up
Button pressed
End of countdown
Find more infos about the Speaker here.
By this point, I had finished testing and programming all the functions and iterated through the code several times to make sure there were no bugs.
We are ready to switch gears to fabrications!
fabrications
I want to make a small and compact case to hold everything inside. If the size is too large, the user will have difficulty carrying it around. If the size is too small, it will be difficult to put all the parts in. Therefore, I need to accurately calculate the dimensions of all the electronics.
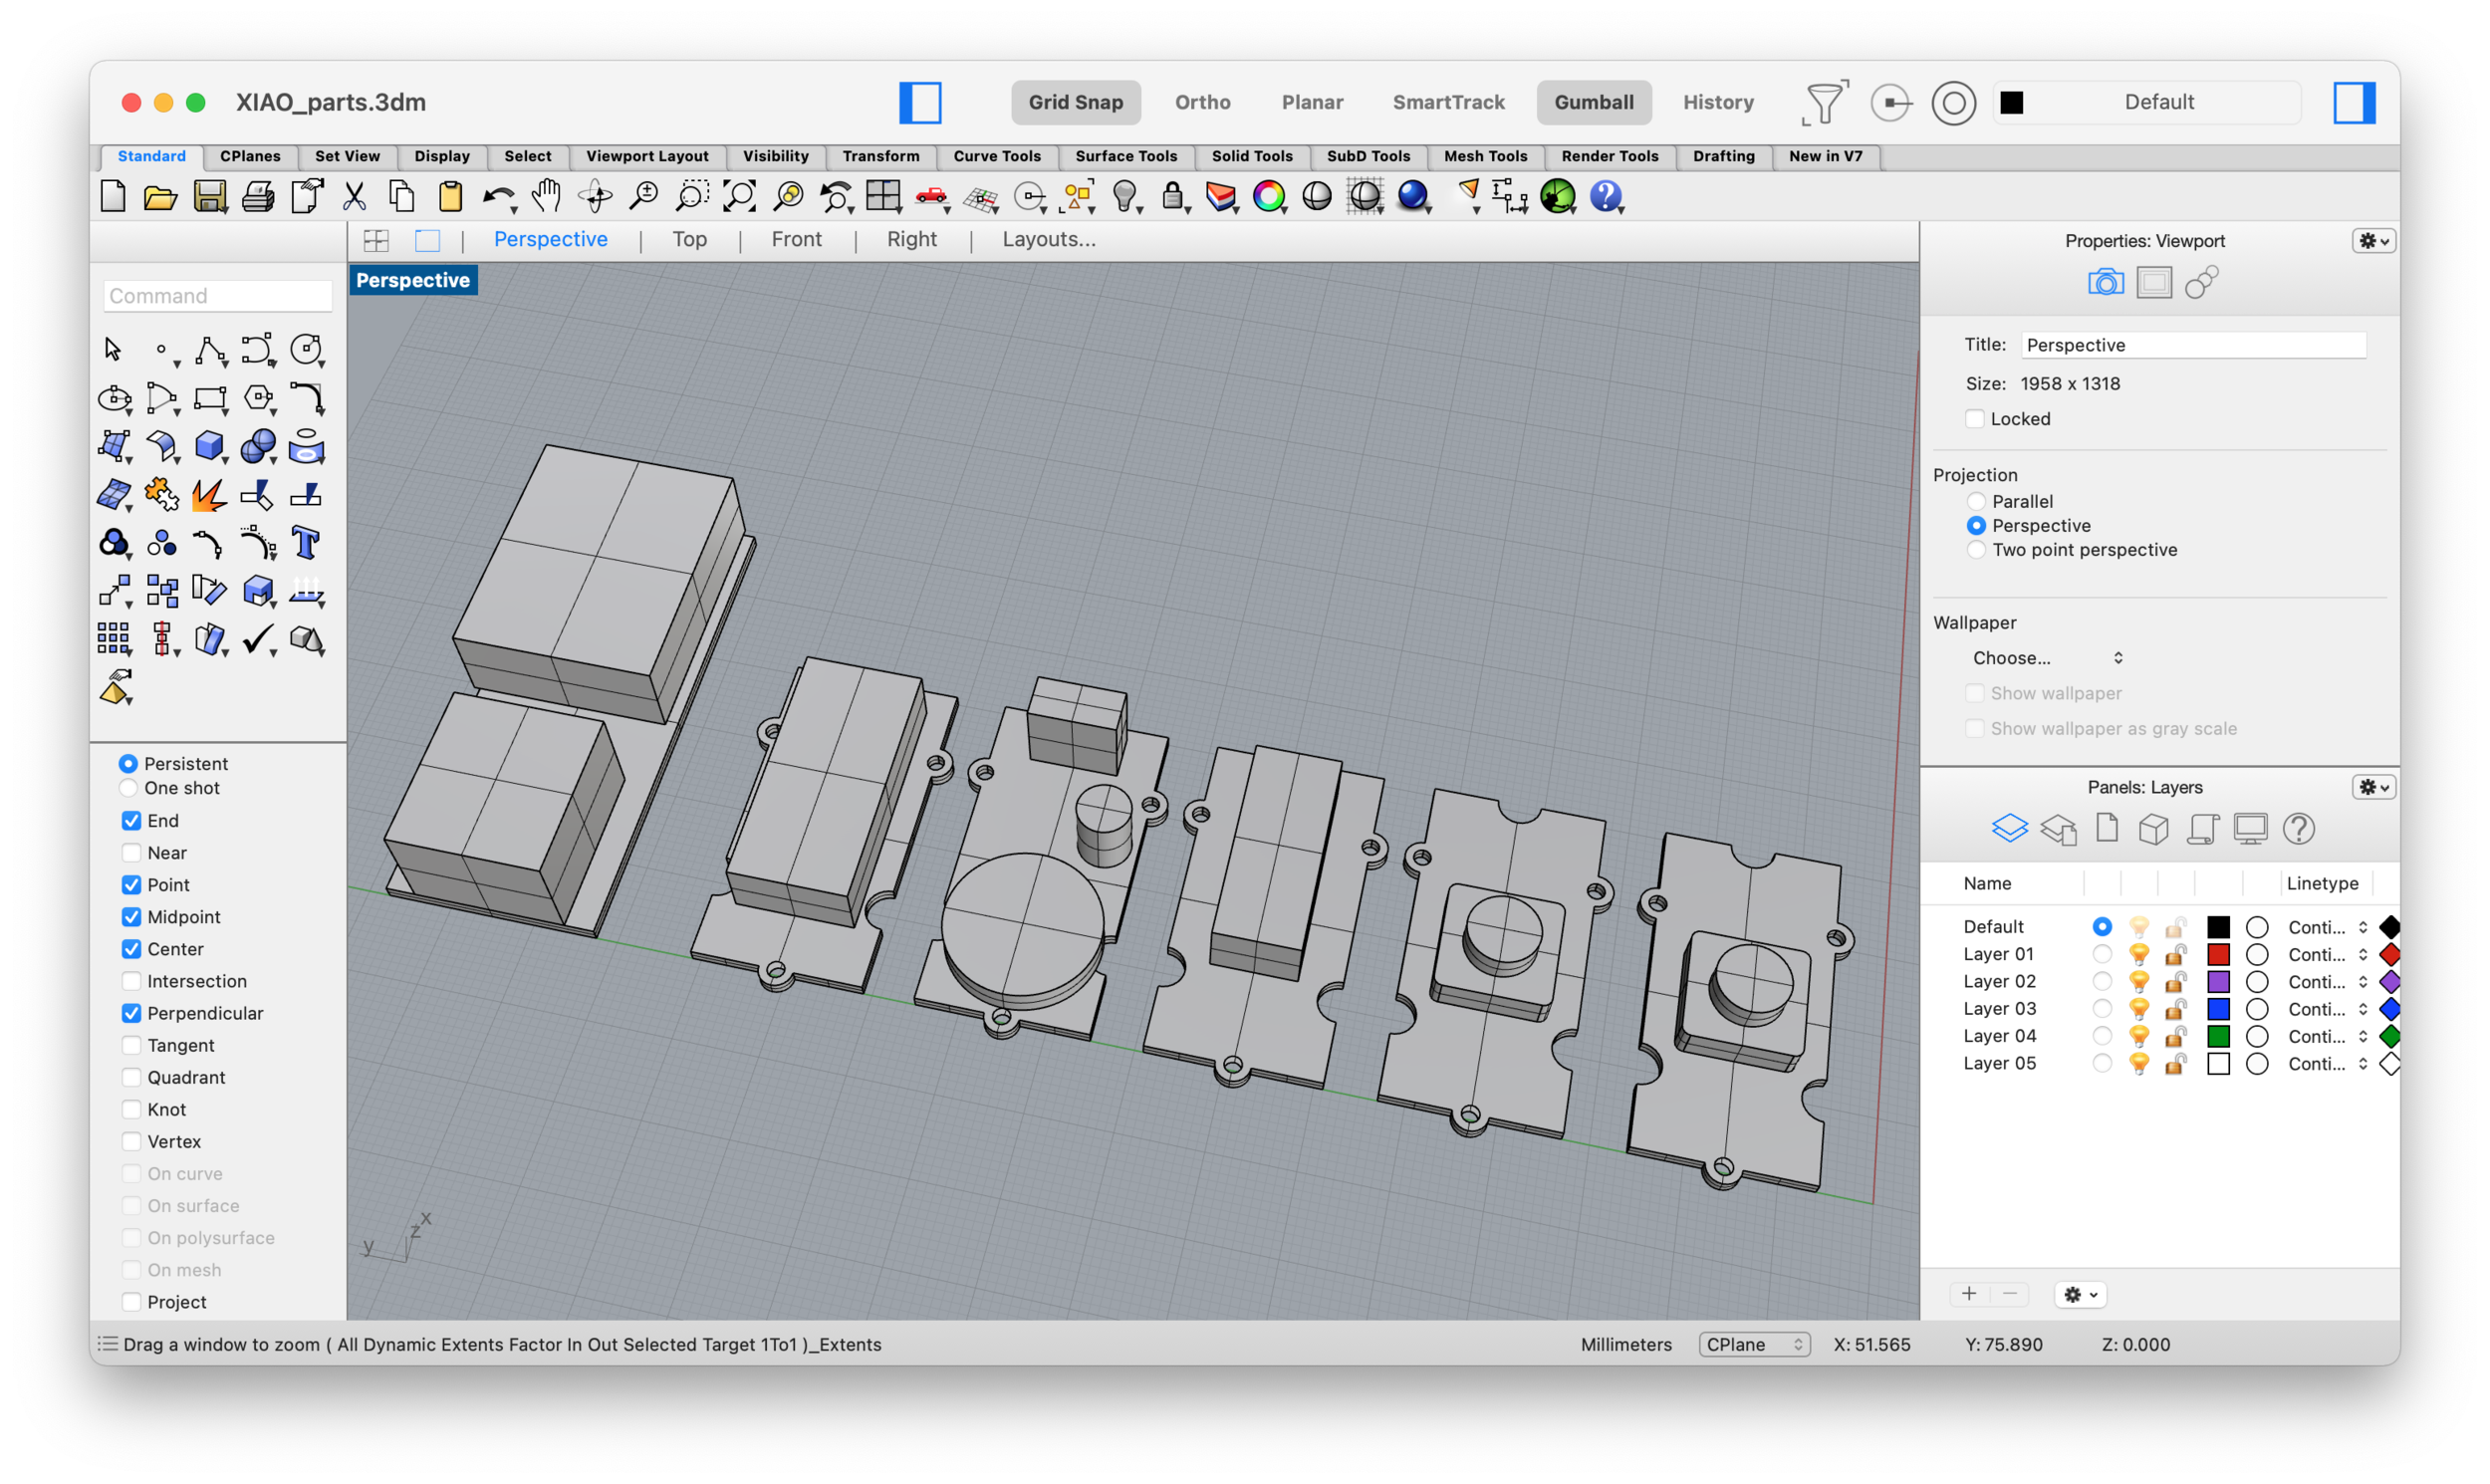
Step 1 - Measure all the parts’ dimensions
I use a caliper to measure all the components I have in this project. It is necessary to measure not only the overall dimensions and height but also the relative position of the core element and the base plate, as well as the fixing holes’ position on the base plate.

Step 2 - Draw/Model everything in the software
I measured the data of the components and drew the components in the software at the same time. I love to use Vectorworks to draw the 2D view, and then I can directly export them to the 3D modeling tool - Rhino. Check to see the two software here.


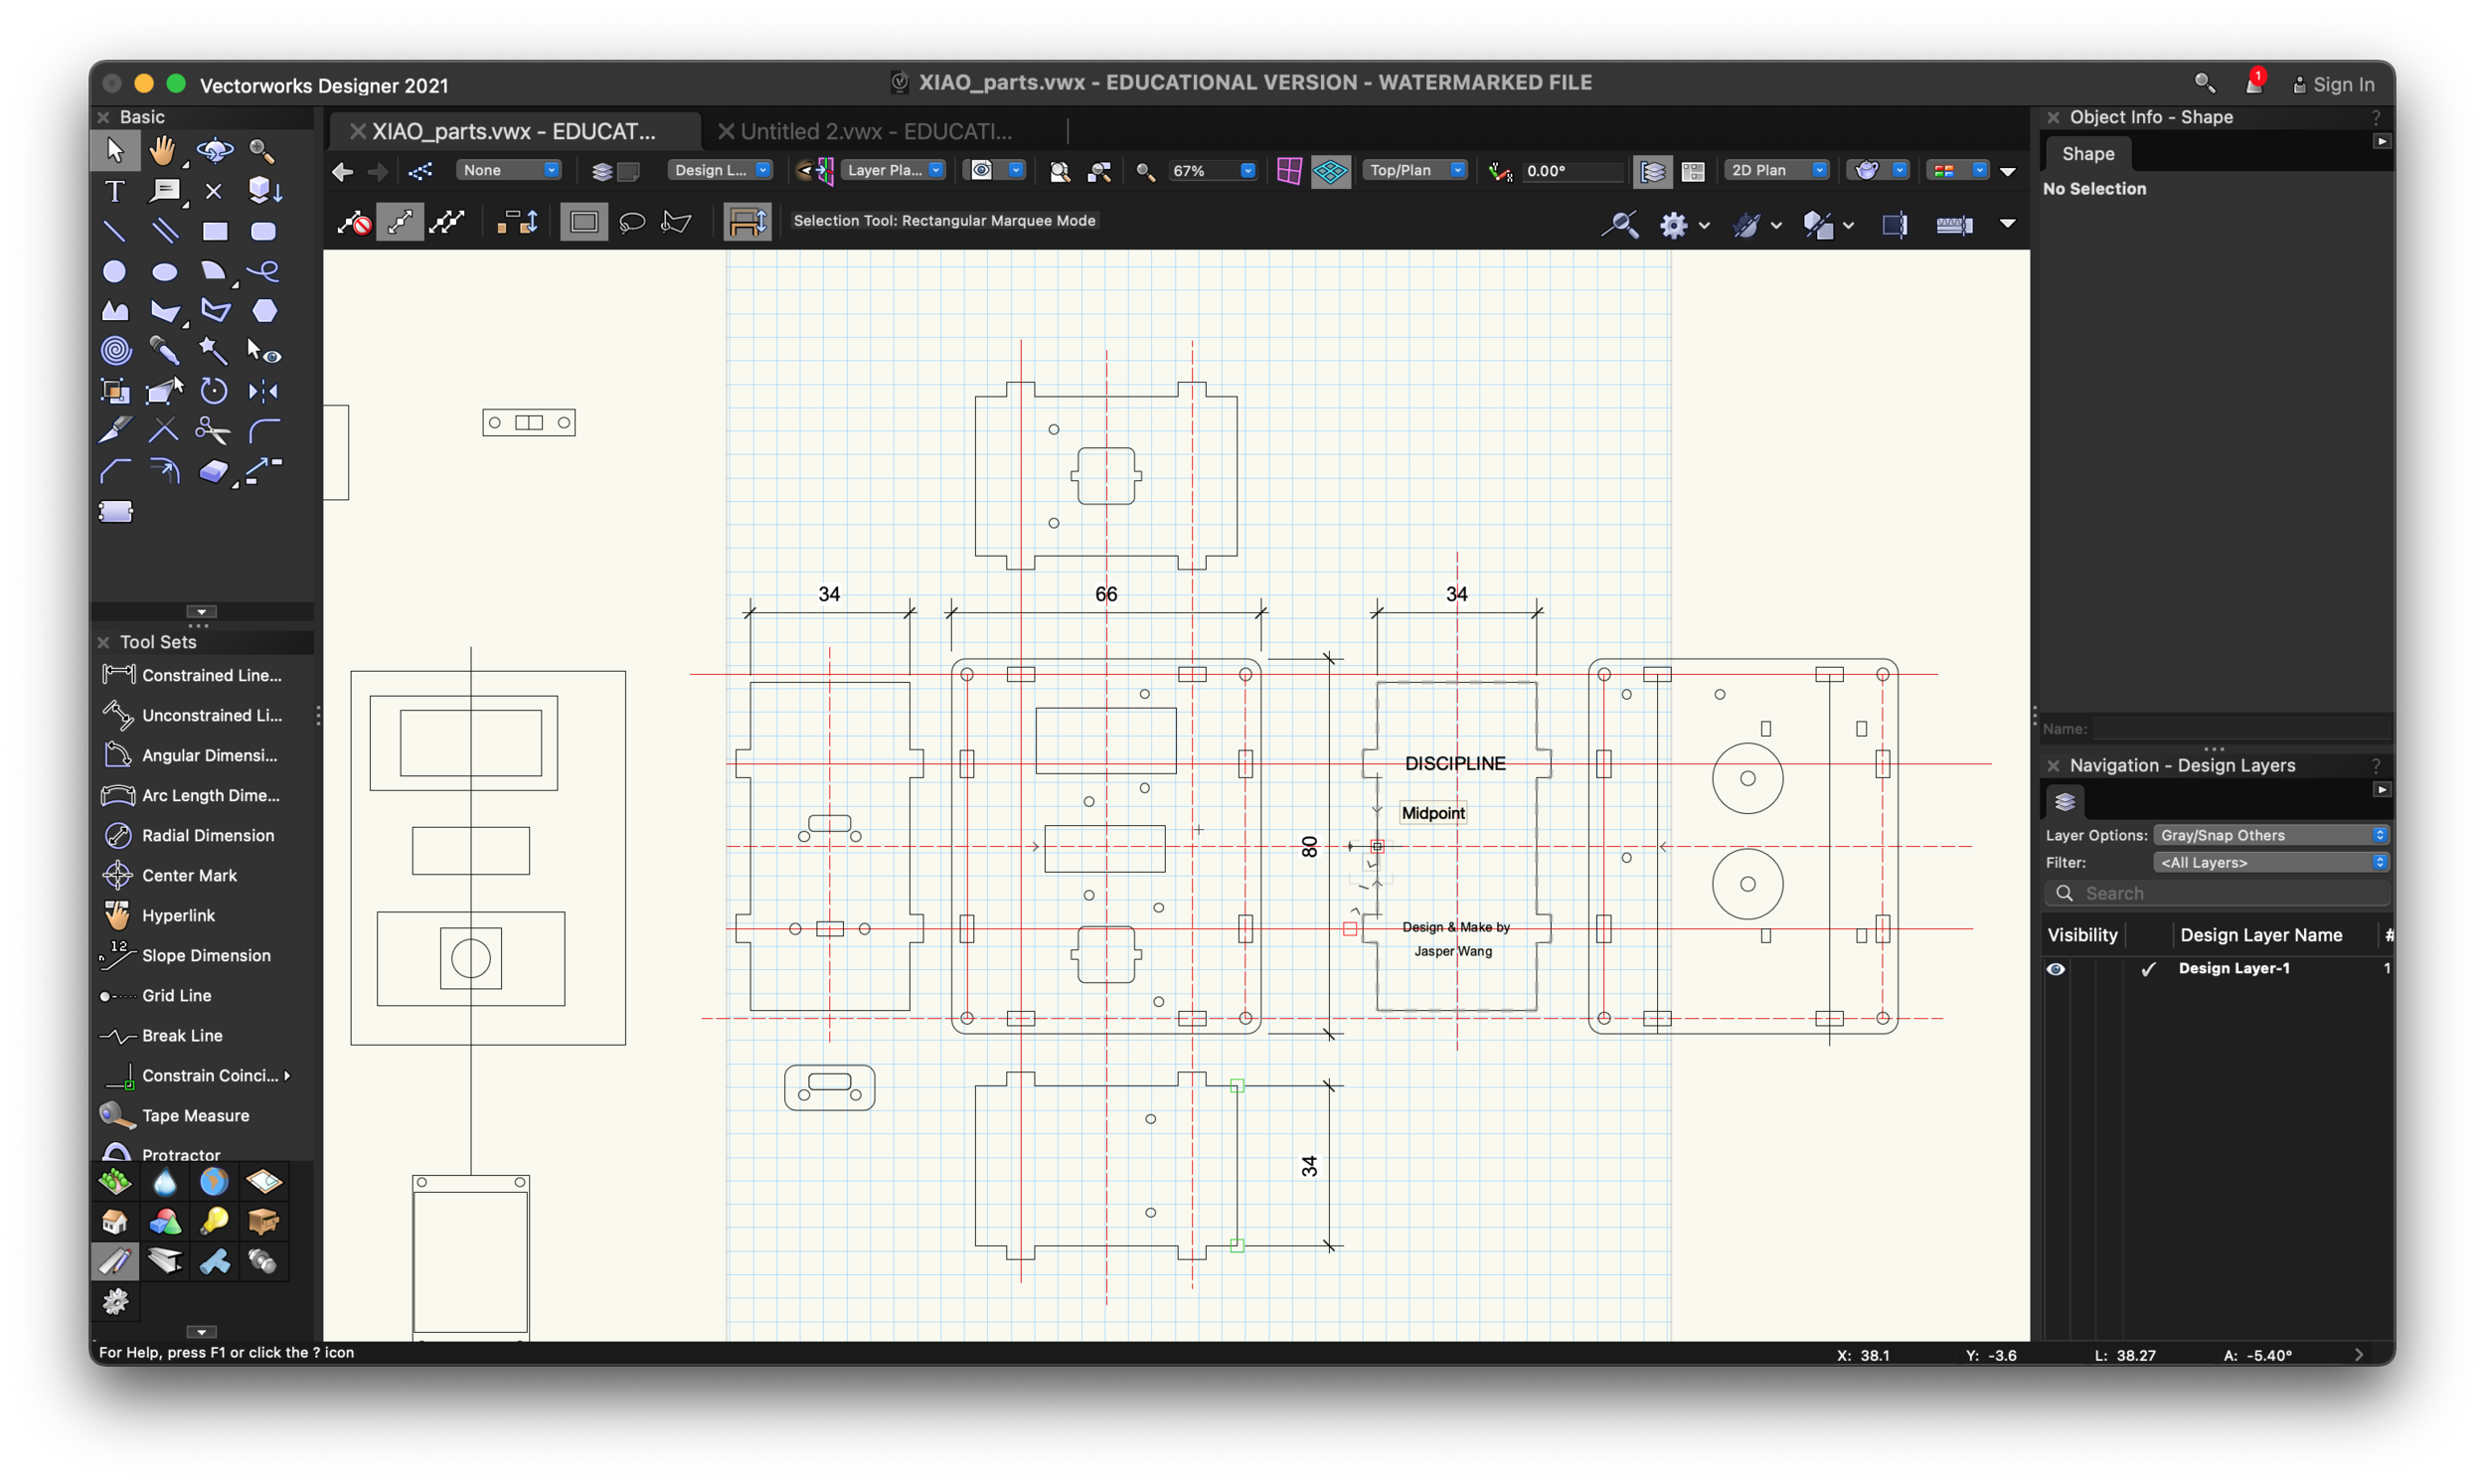
Step 3 - Design the panel layout
After I get the correct sizes of all the components, it’s time to design the layouts on different panels. So I tried different ways to find the best User Interface.

I finally chose to use this design, so that users can easily hold it with one hand and operate with only two fingers.

Step 4 - Magnetic attachment
I really love magnets, because magnets attract so perfectly and without any traces.
In addition, the magnet can be attached to any position on a surface. This immediately made me think of another pain point when using my phone at the gym, which is that it's not a pleasure to bend over and pick it up! I used to think how nice it would be if the phone could always hover around the gym equipment, so I can grab it easily.


Therefore, I want to use the magnet to attach the product to the places where interactions and operations can be achieved more easily.

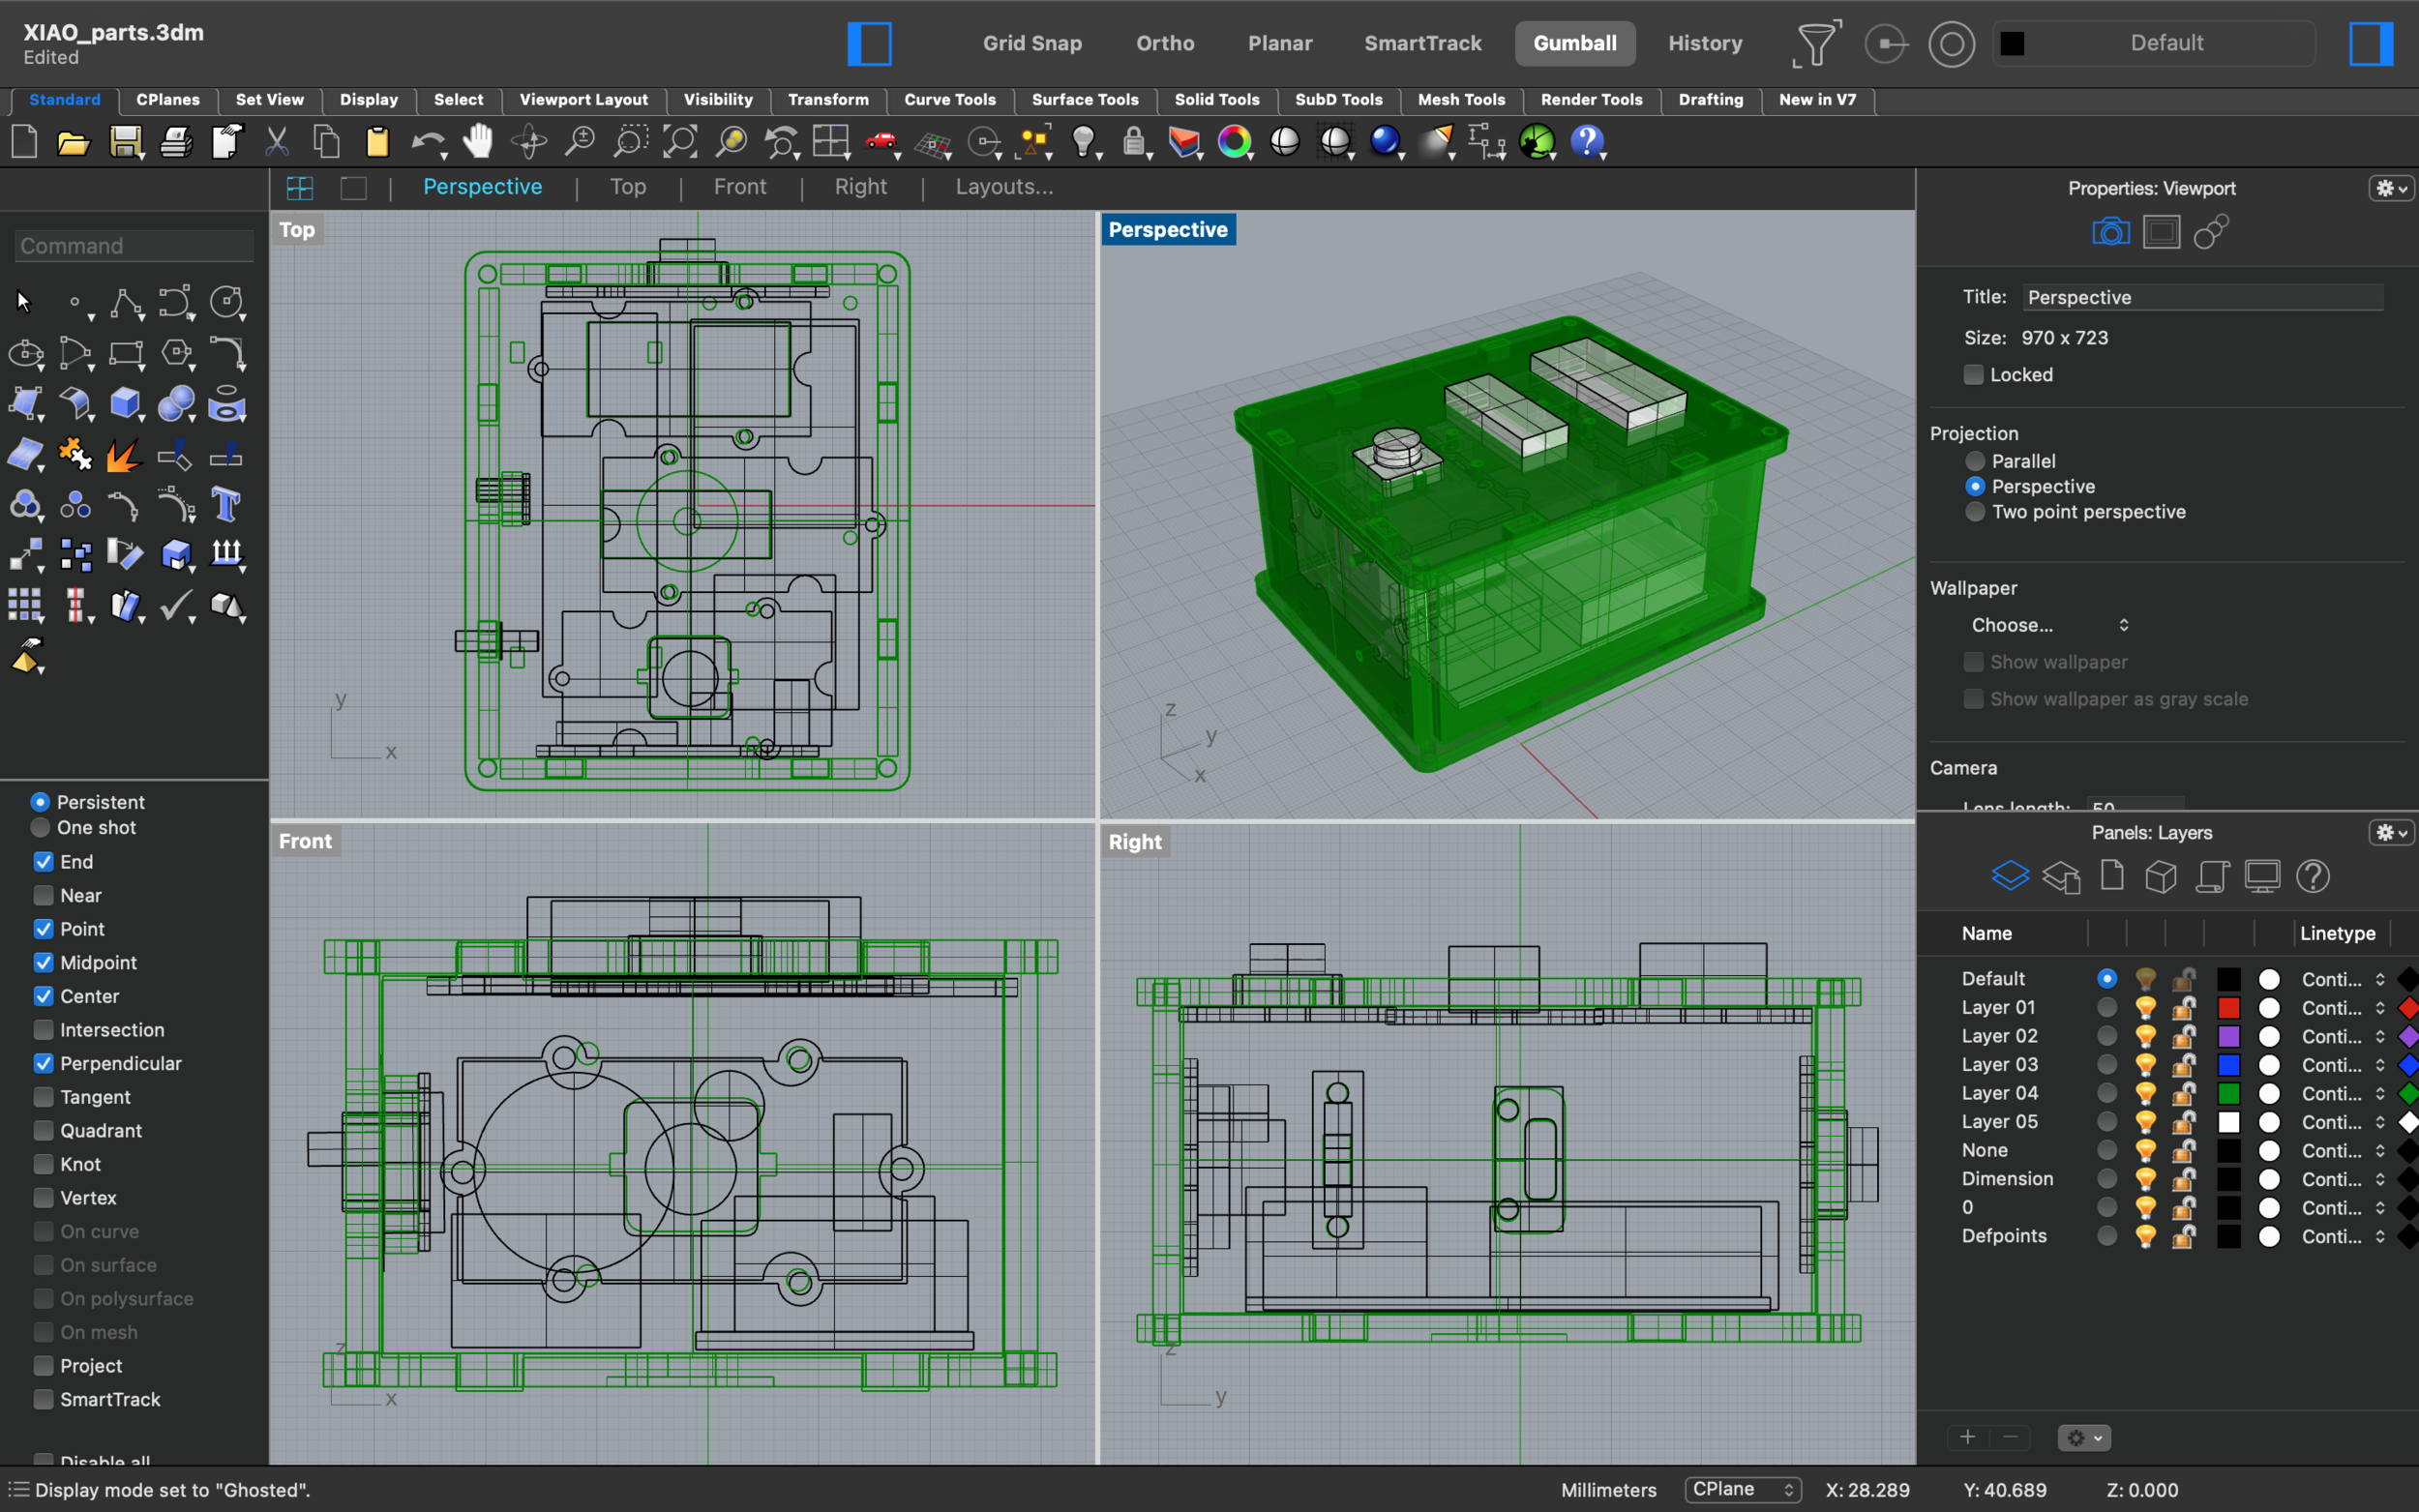
Step 5 - Design the whole case
It does take me a while to design the whole case and the structure inside to make sure every component can fit into the right position, more importantly, they won’t conflict with each other in the small area.

Export to Rhino, and build the 3D model, then render it roughly in KeyShot. By doing this, I can preview how each part behaves inside, which can greatly reduce the design errors.


make it now!
After making sure all the designs were correct, I sent the drawings to the supplier for laser cutting.
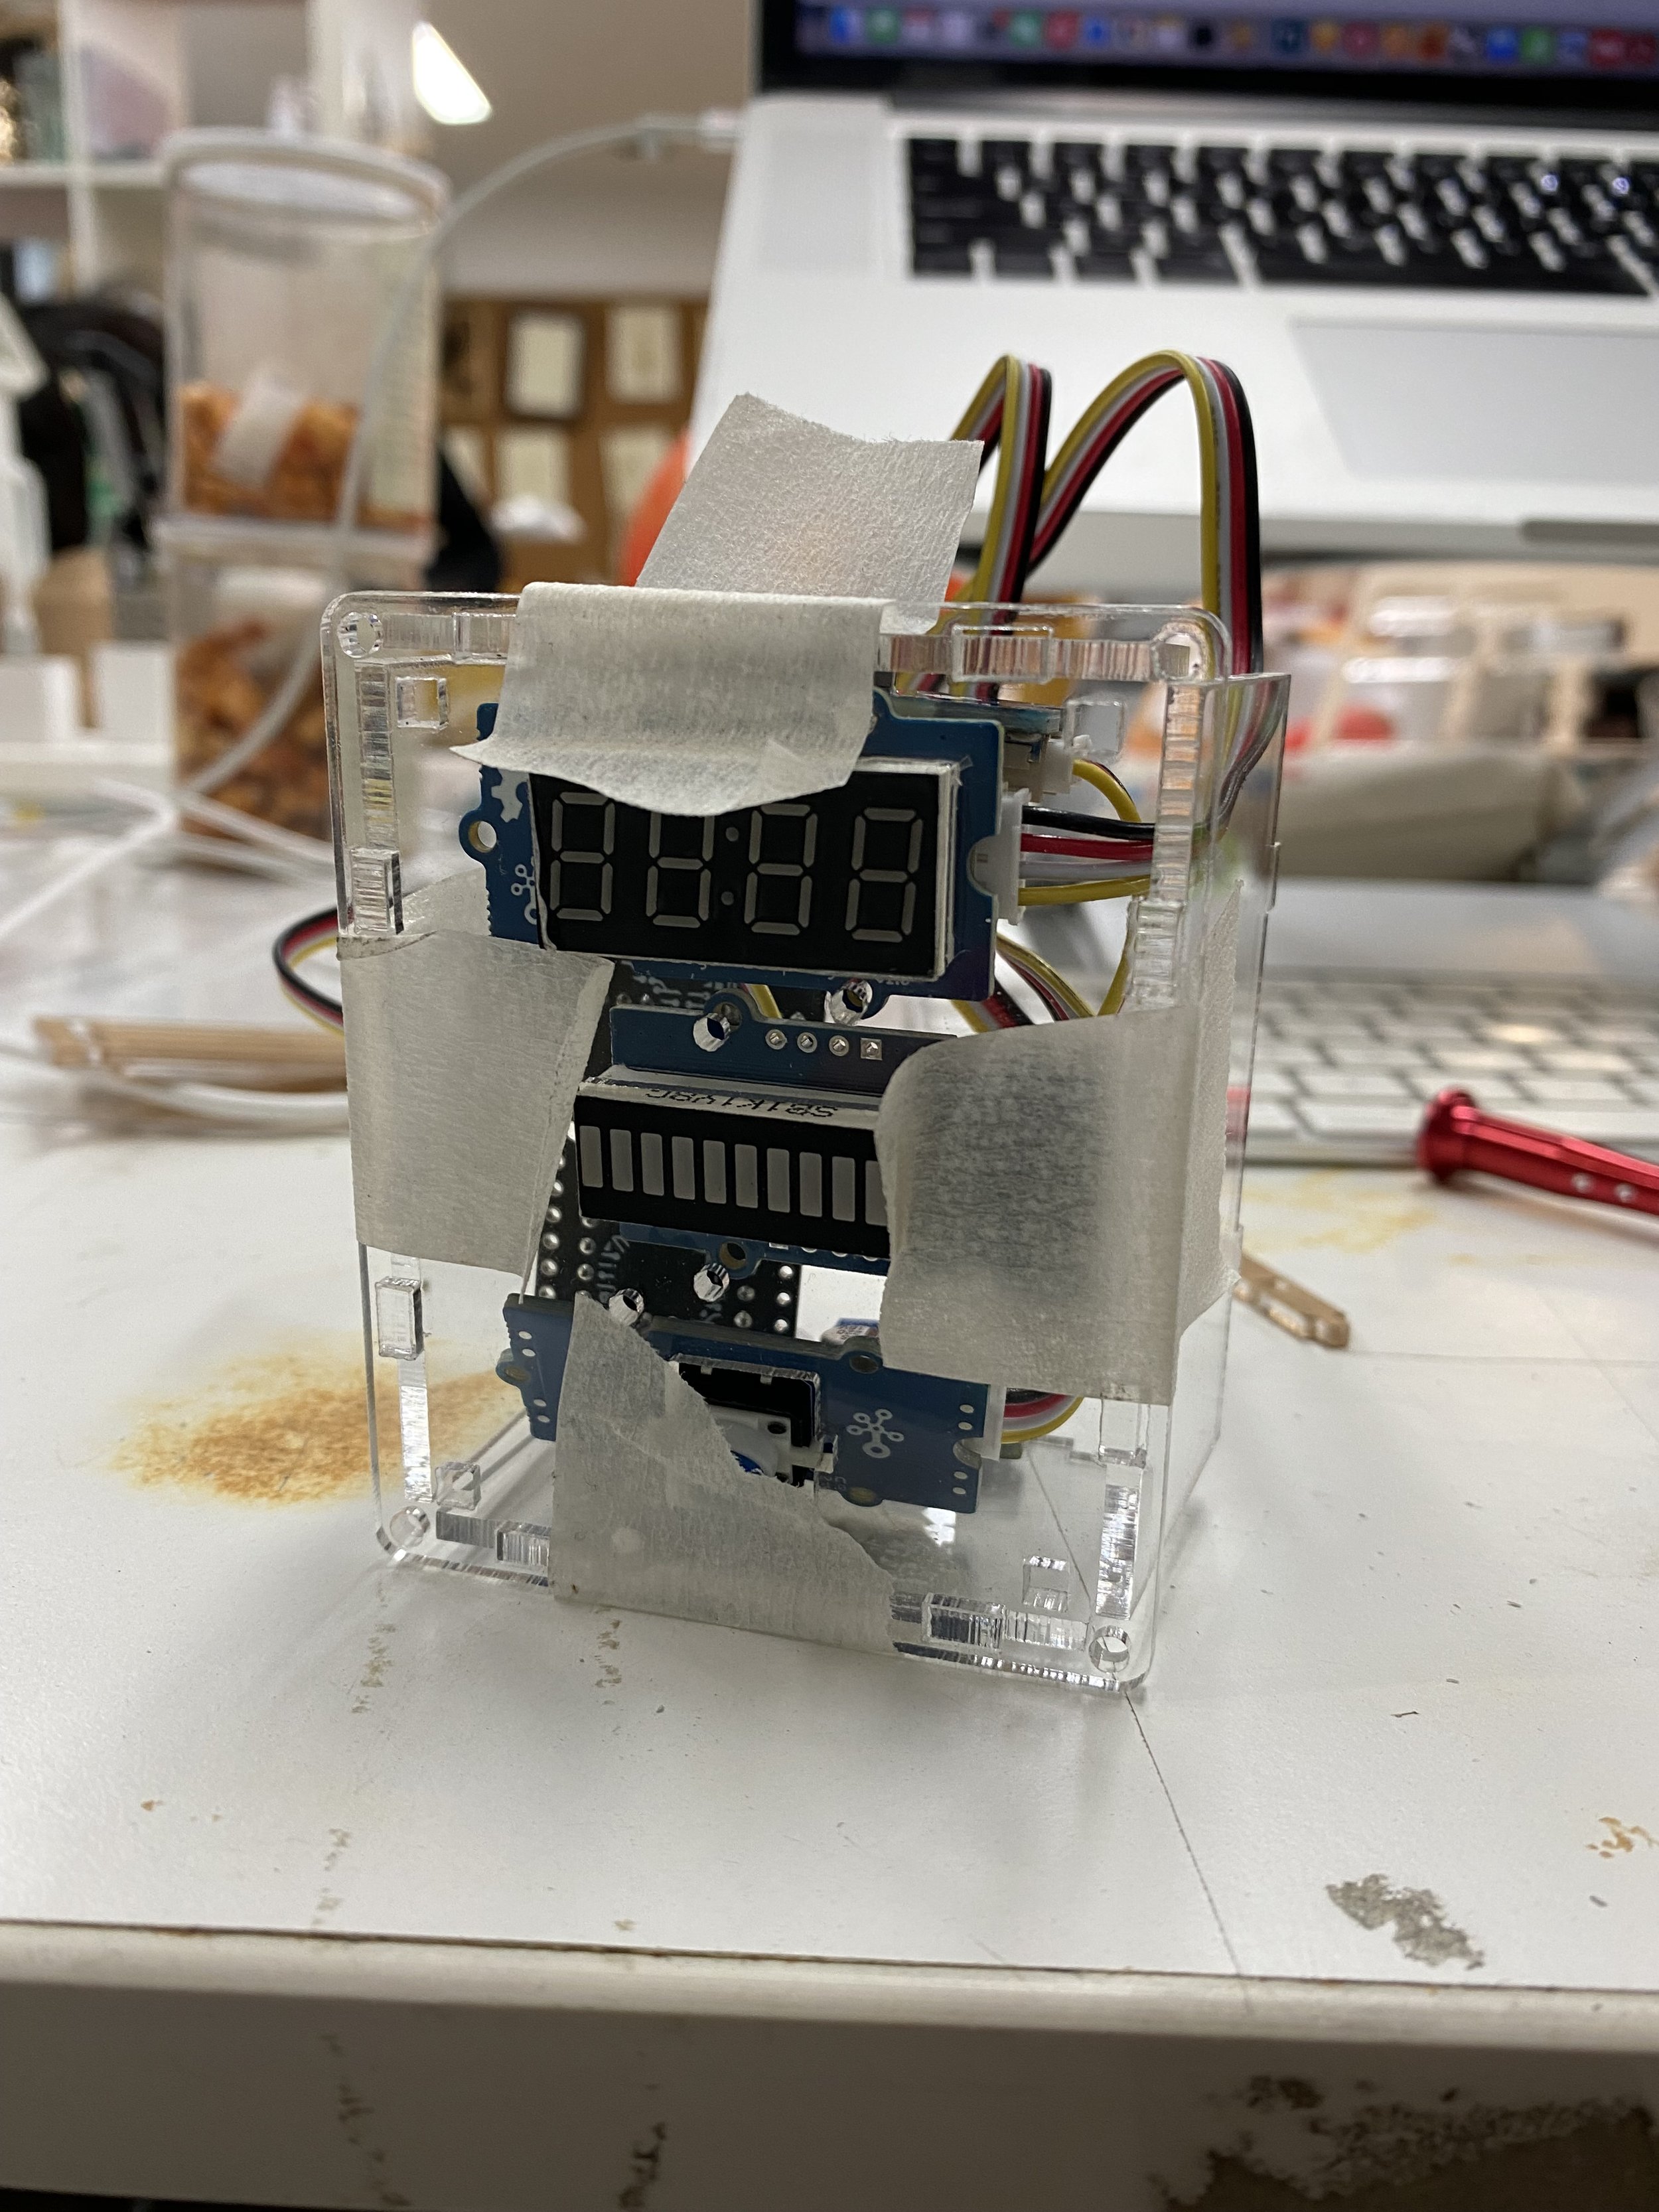
Two days later, I received the sample, the process of disassembly is really nervous, afraid of which position miscalculation and the physical assembly does not match.

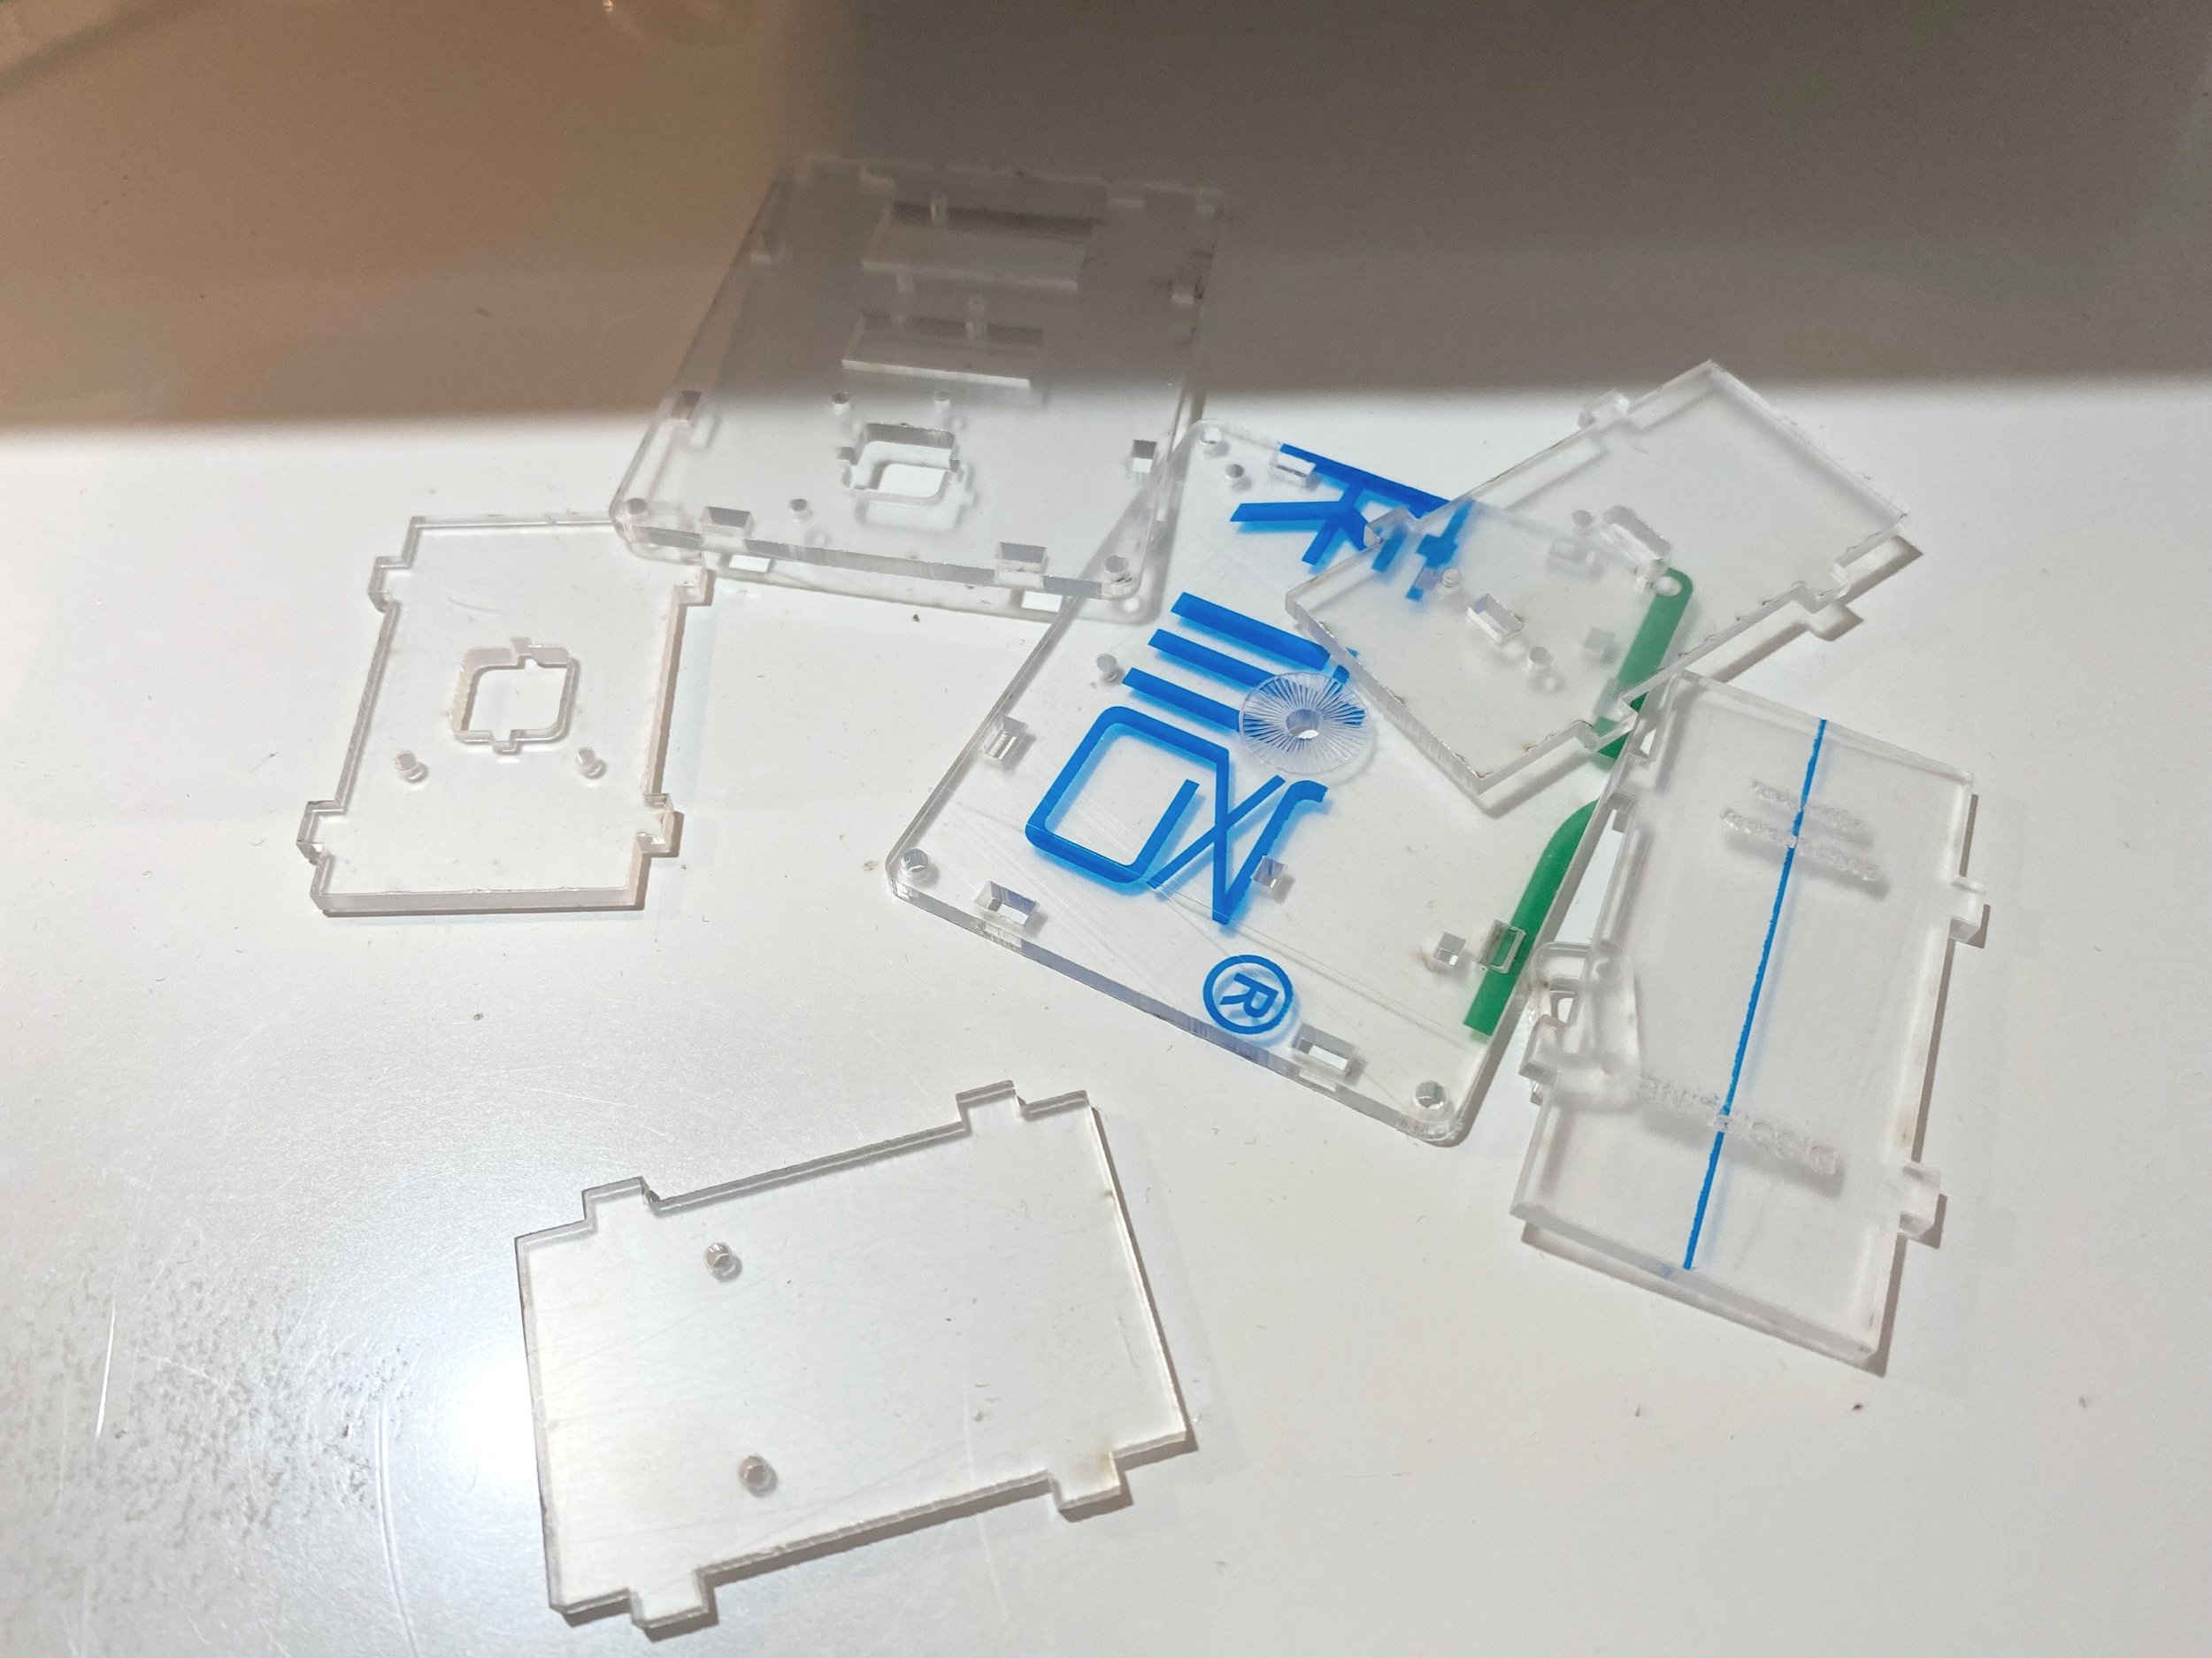
Sadly, there are 5 parts don not match with the components.
It’s very hard to get a 100 for the first time, it’s no shame to modify and do it again and again, that is how Maker wins!
The problems I find are listed below:
Miscalculate the screw distance for the Button
A small range error of the XIAO shield’s screw distance
Miscalculate the Type-C screw fix distance
One magnet is not able to hold the case, it may happen to rotate
The distance of the which to hold battery is too far from the sides
So I did it again after correct all those mistakes I made in the first try.
This time, it works well!

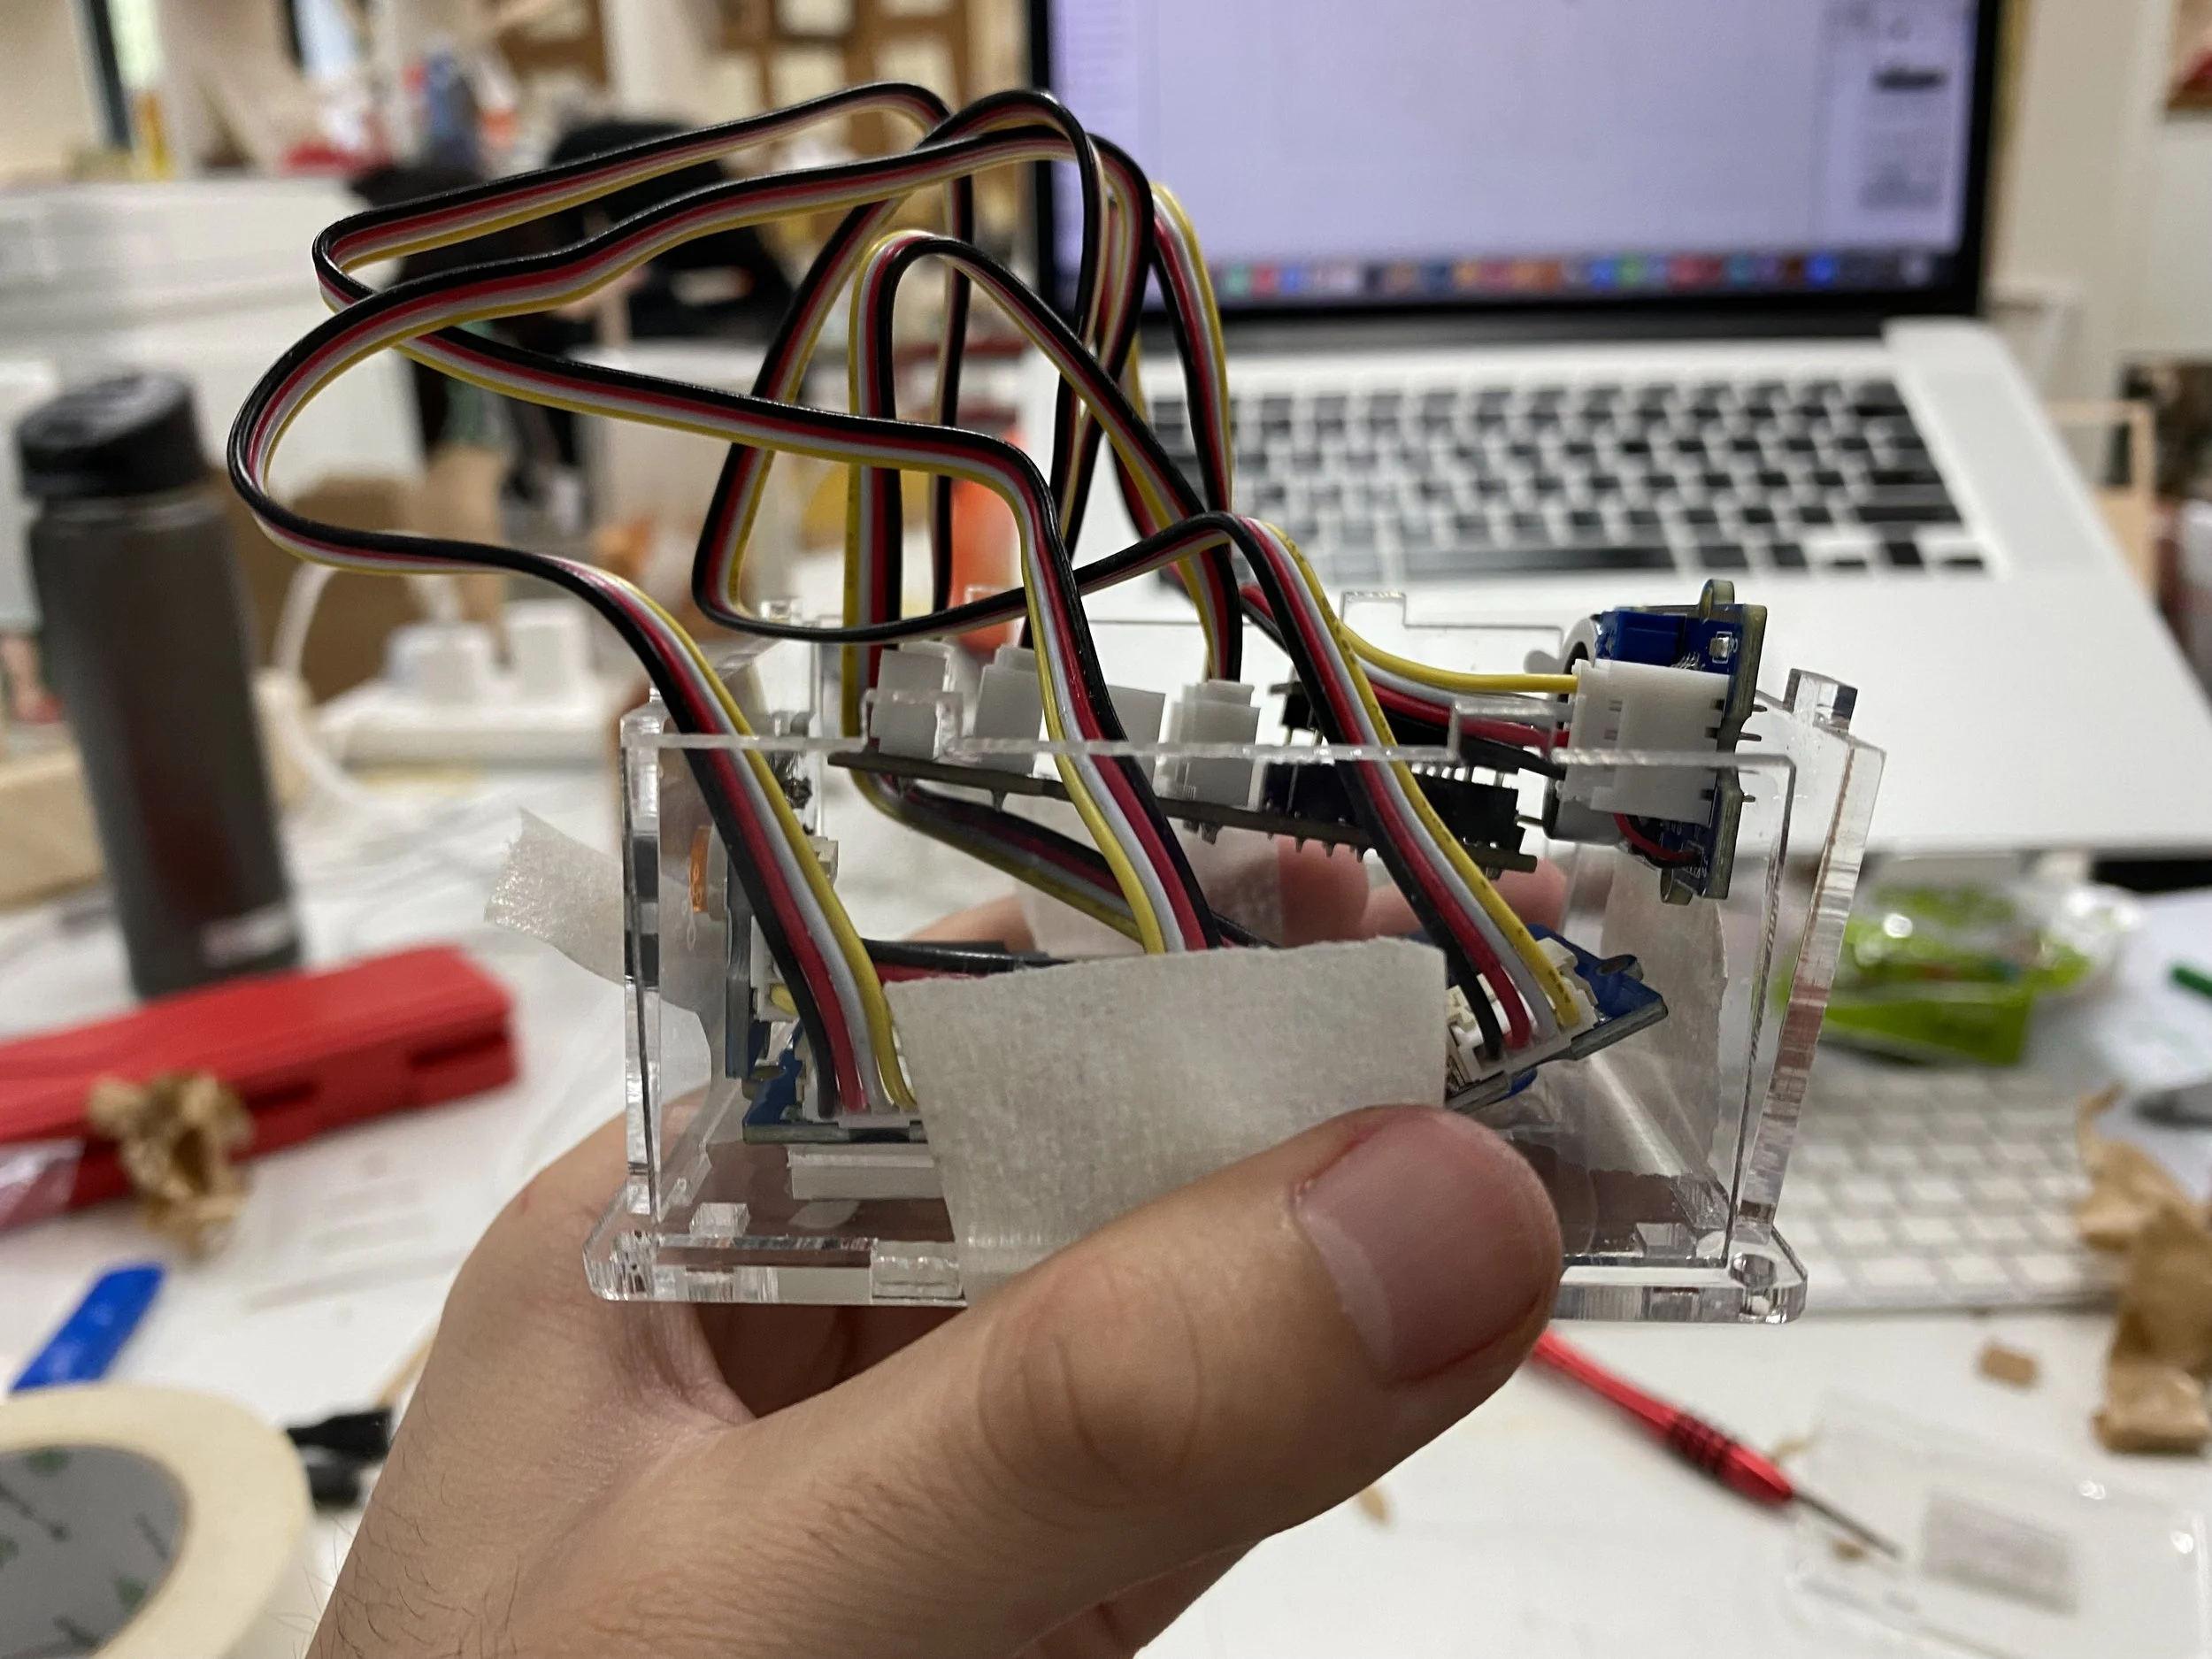
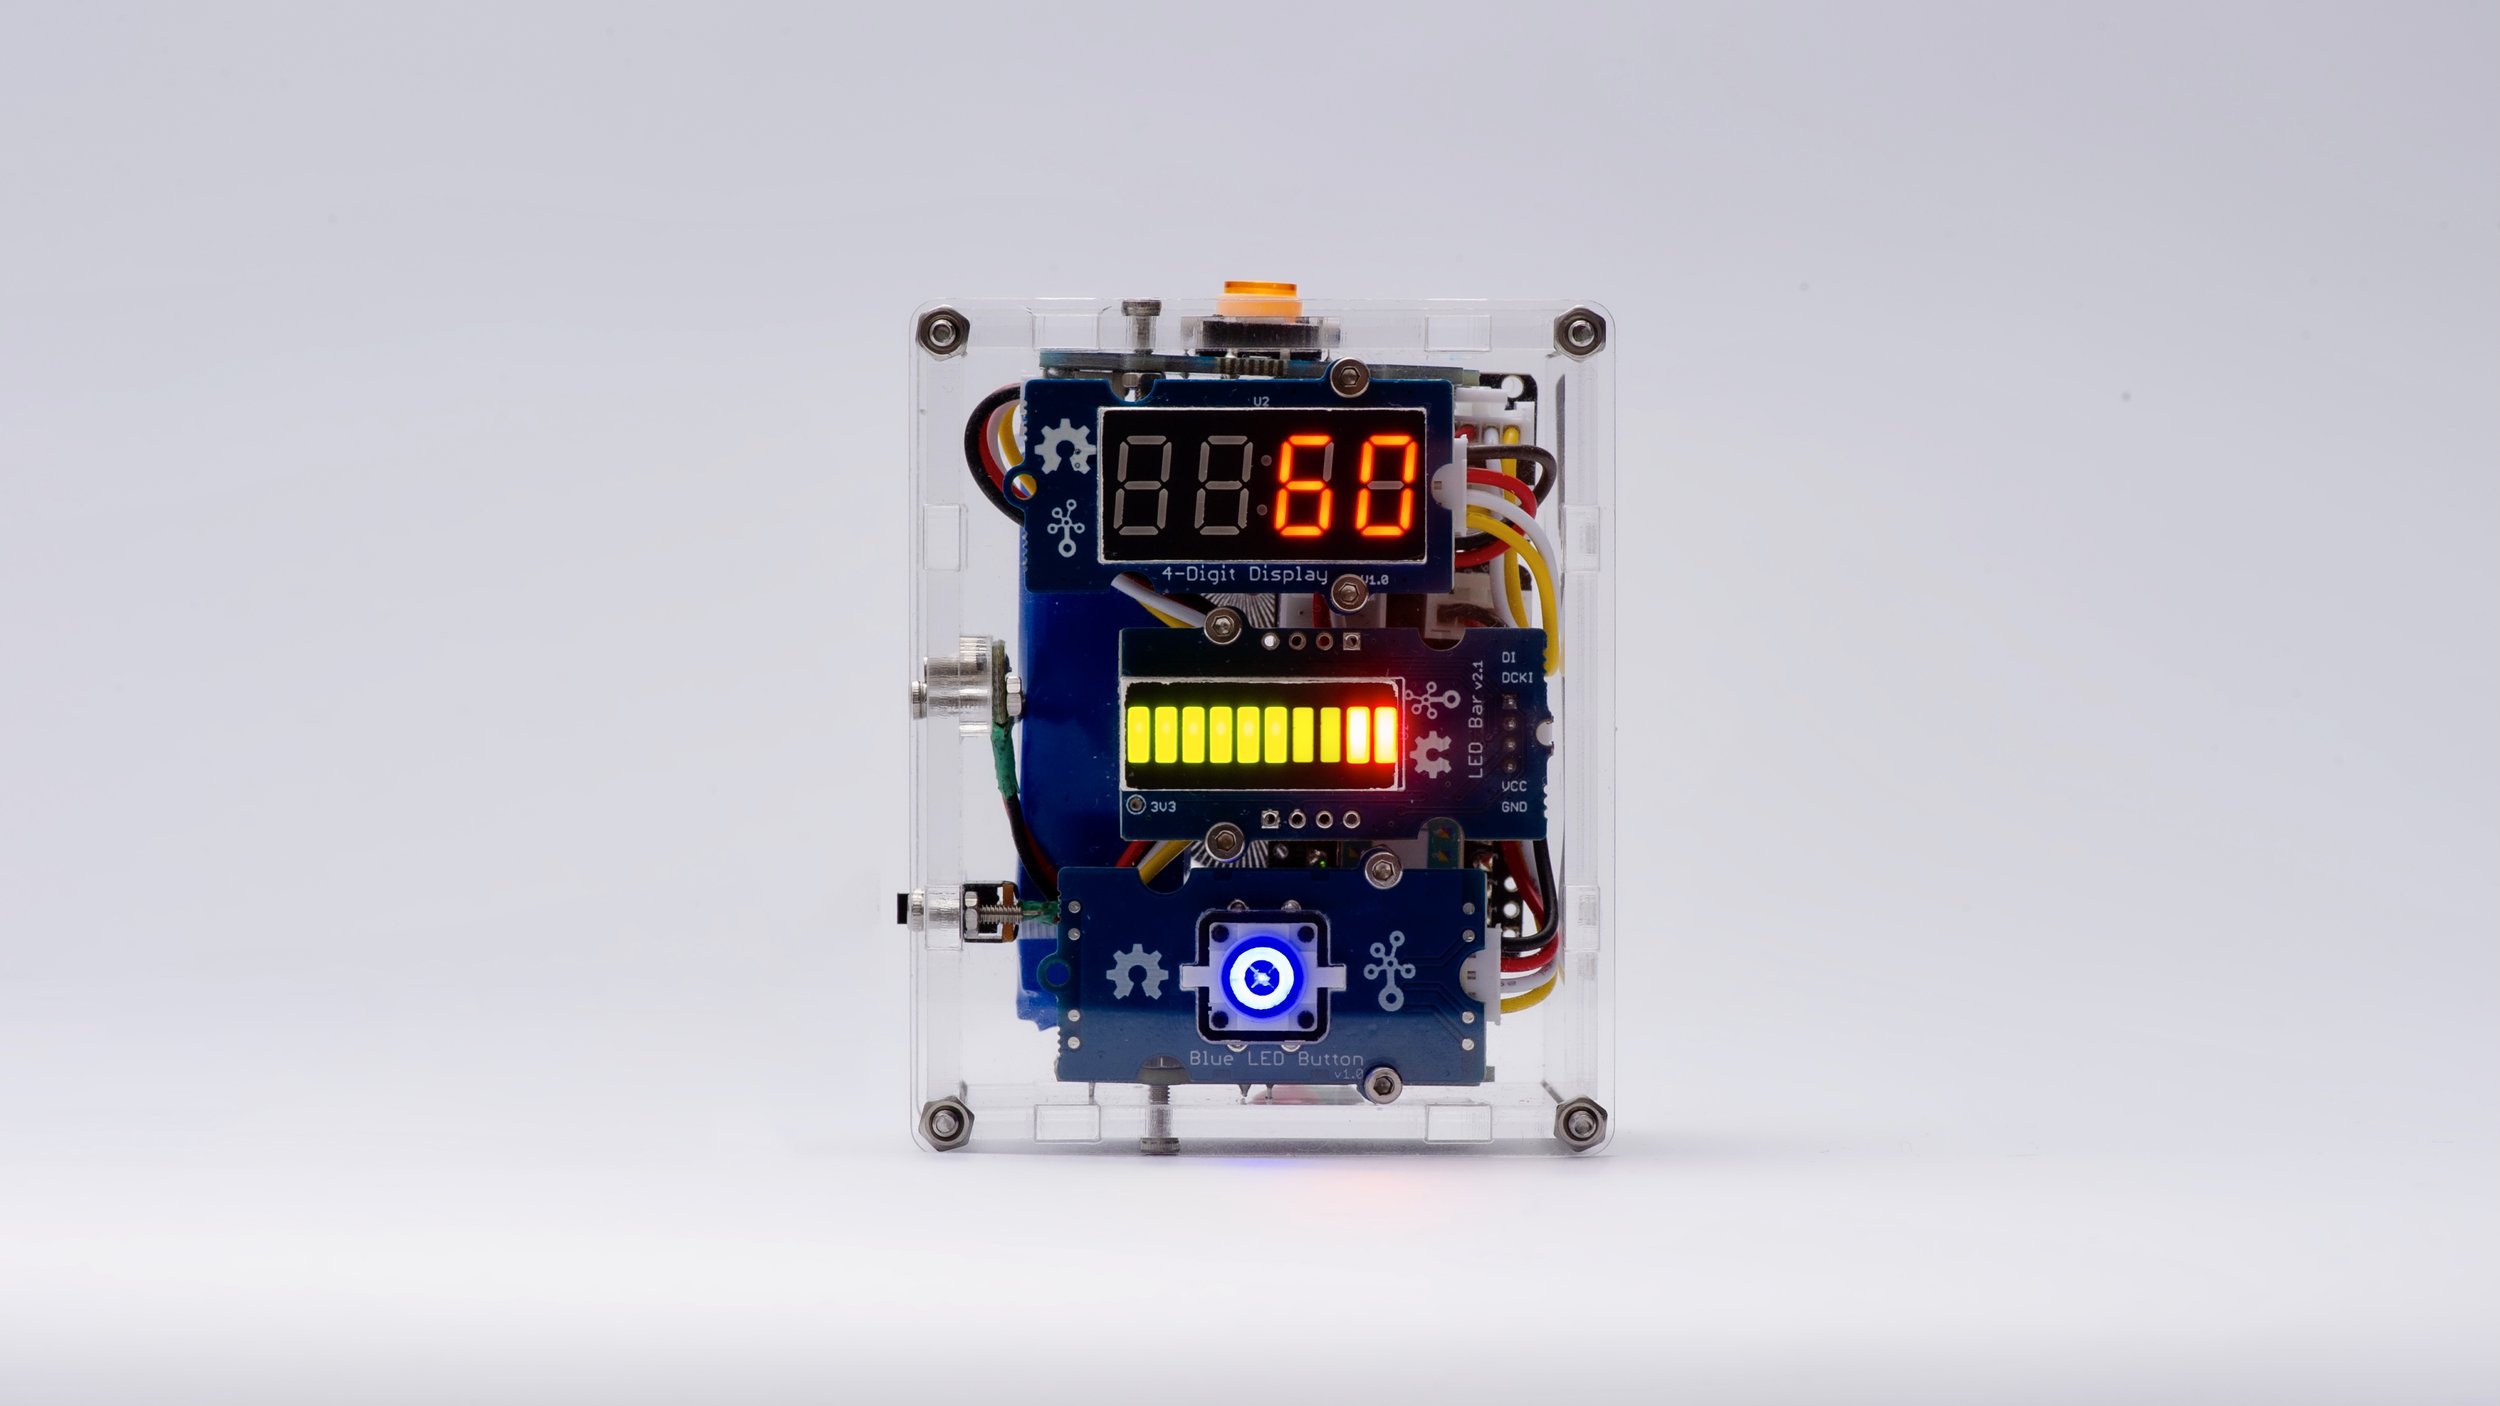
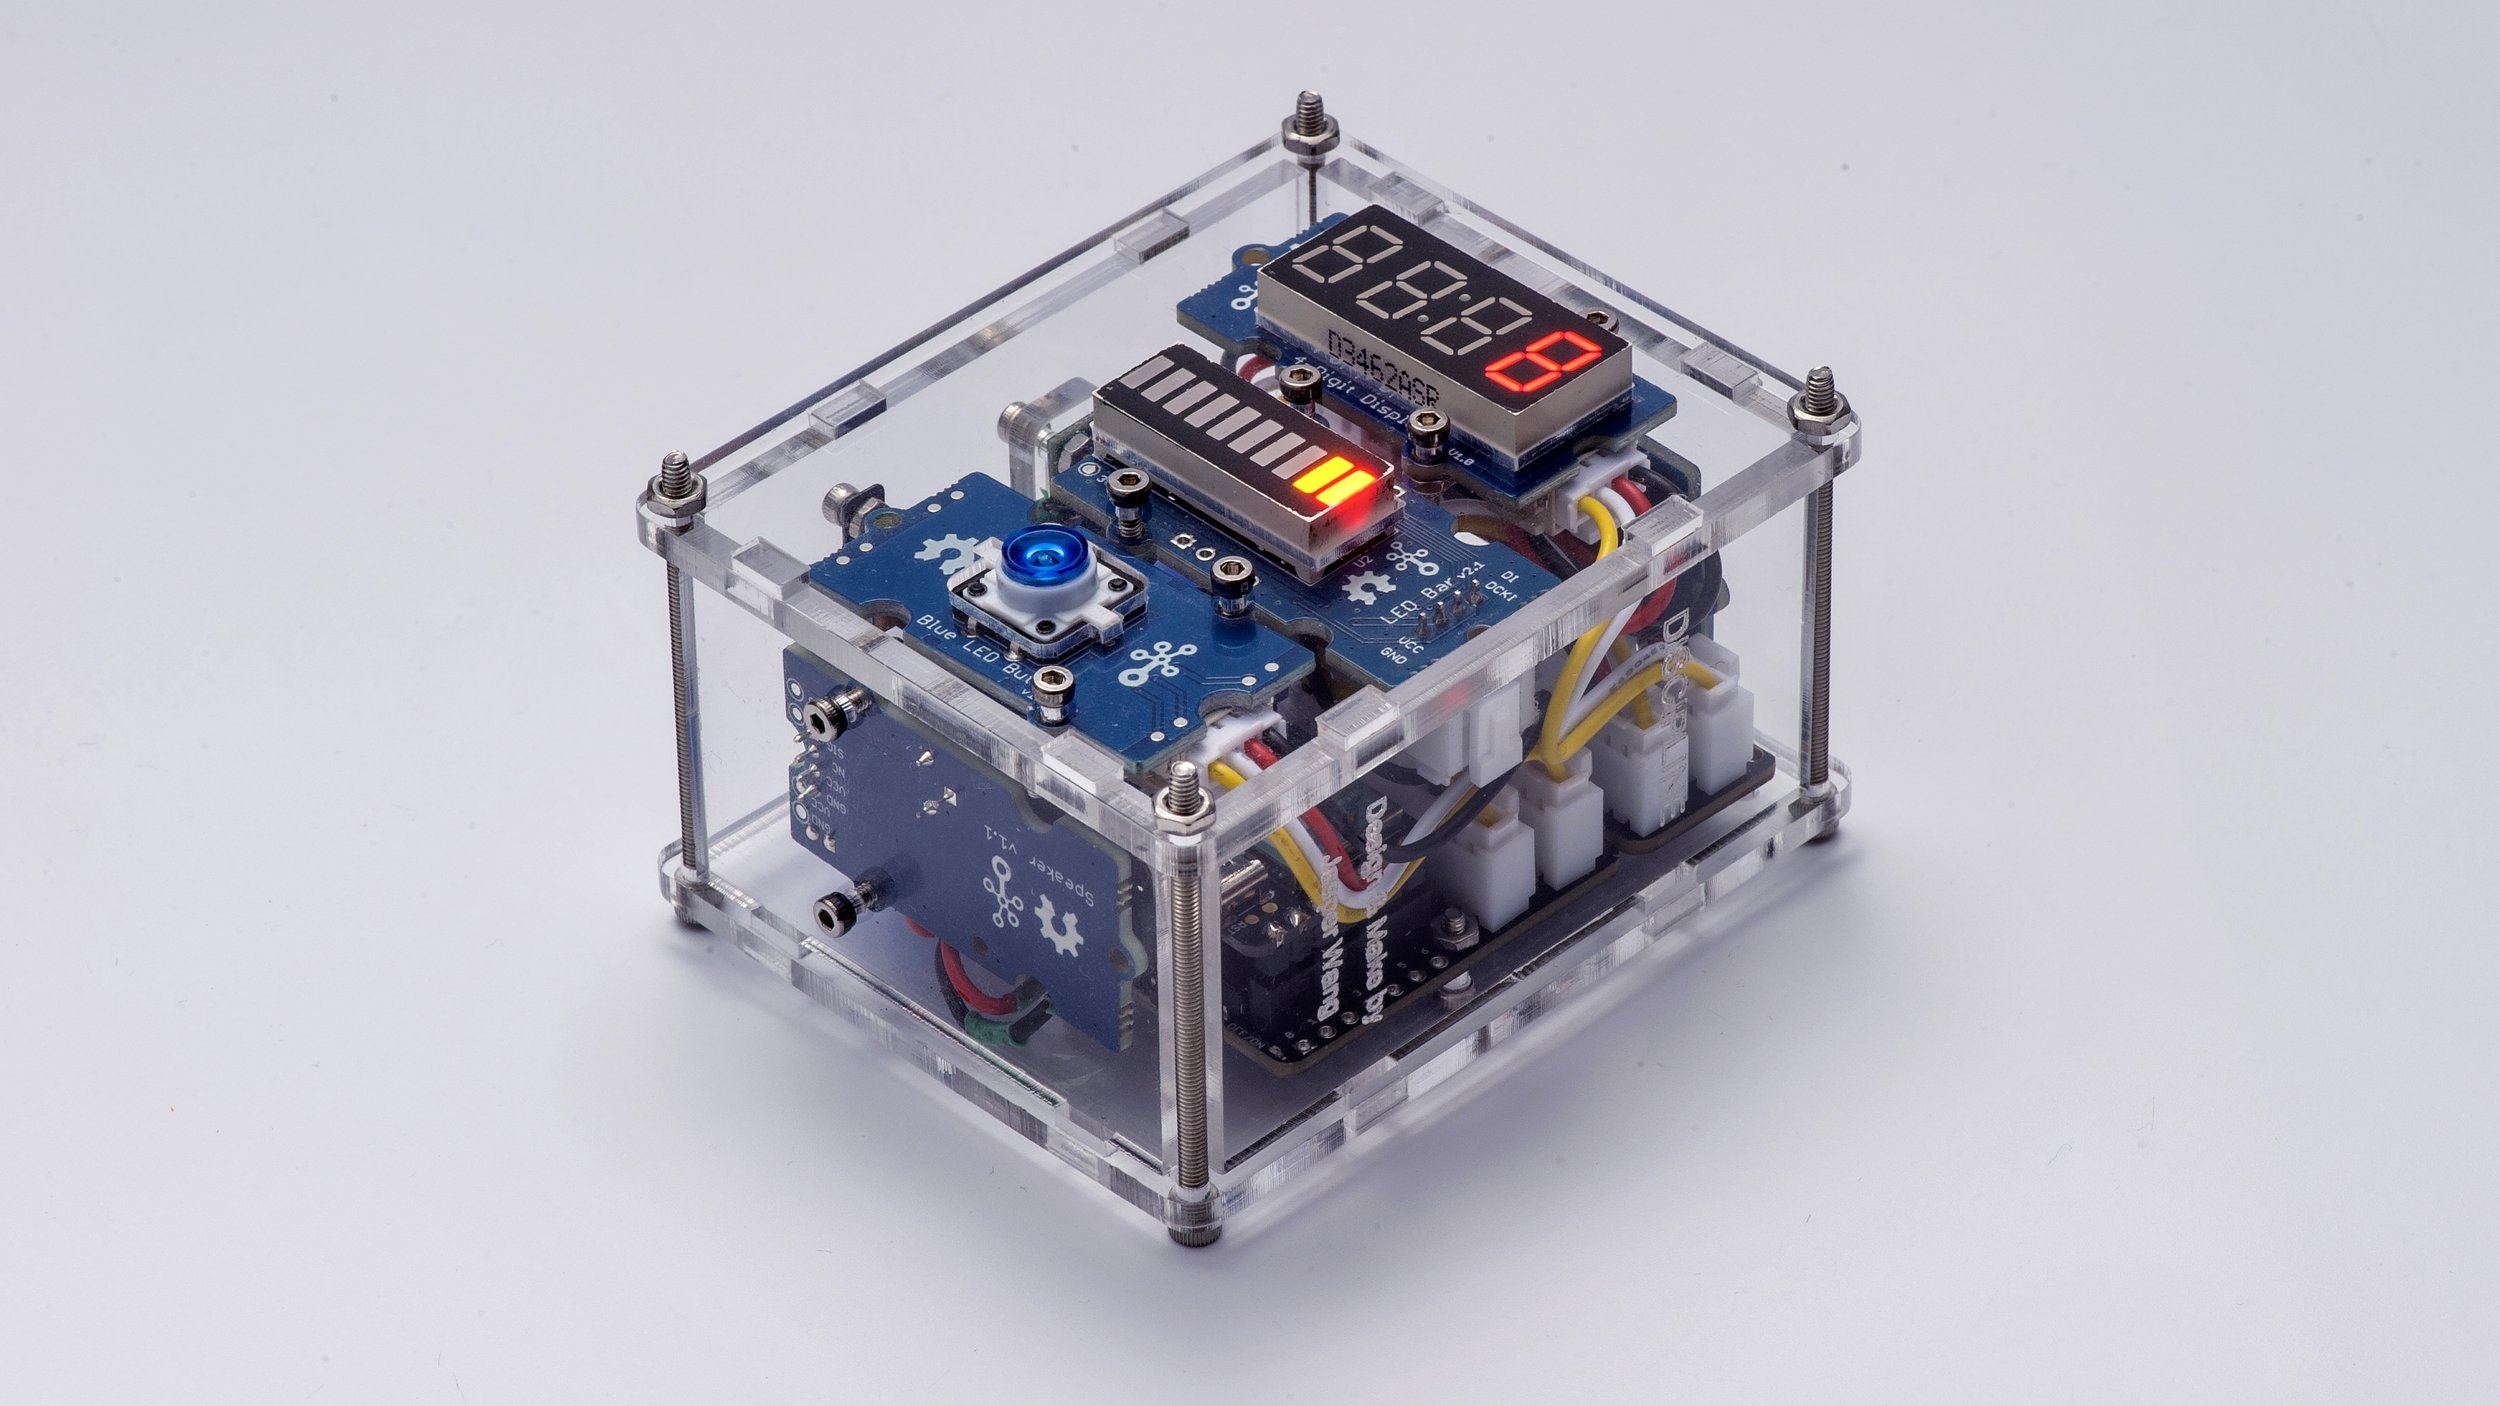
Now, it the most exciting moment after all these progress, is to put everything together.

See how it works.


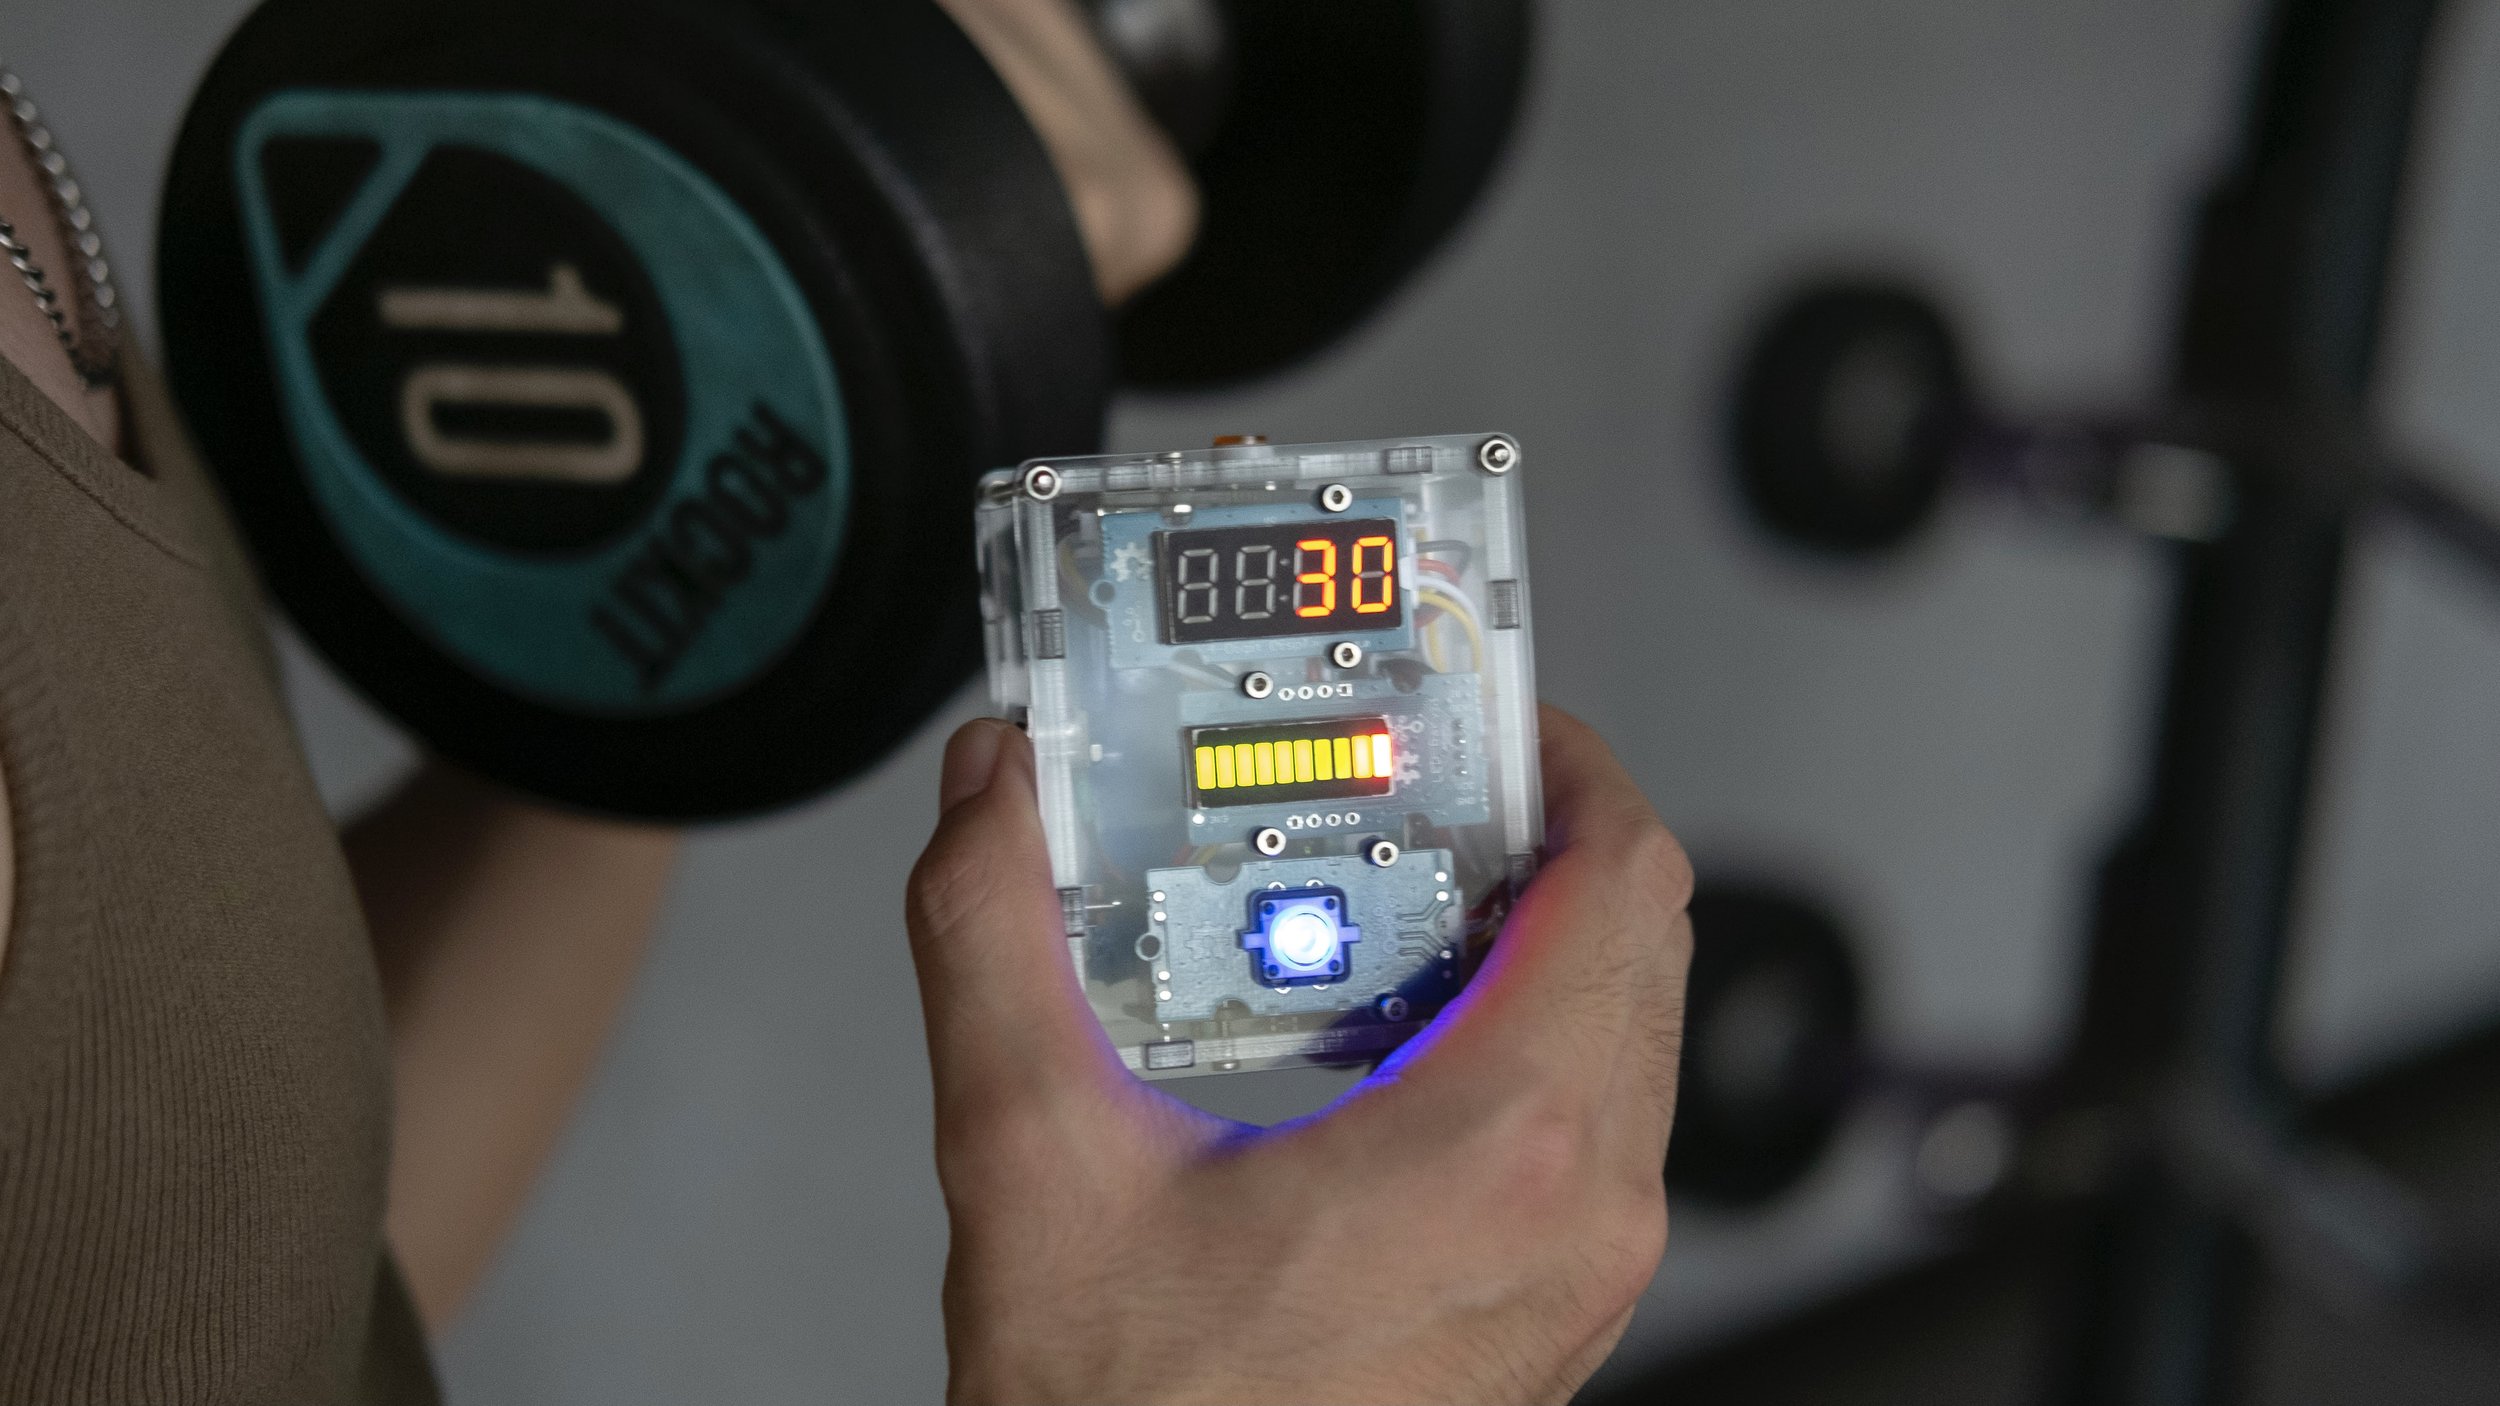
test discipline in the gym
The next day, I took Discipline to the gym, and test it with a real workout to see how it can perform, and how it can affect my training.
It turns out Discipline works really well! It can literally be attached to any gym equipment.


After bringing Discipline into my training, the time to form breaks became very clear at once. Instead of playing with my phone all the time during set breaks, I took this time to efficiently adjust my breathing and relax my muscles. After the whole set, I obviously felt more tired than my usual training, which also proved that strict control of rest between sets can improve the intensity of our training.
Discipline successfully played its role in assisting me.
Thank you, Discipline!
Summary
I love fitness and I love to create, and I hope I can bring this love to my friends around me through my power.
I would like to thank Seeed for sponsoring all the electronic components.
I want to thank myself for being able to hold on to this love.
See the project’s code and laser-cut file here.
Peace~
FAQs
is discipline an open-source project?
Yes, everyone can have access to my documentation, code, and laser-cut sketch.
How difficult is it to make one?
It depends on your current level of knowledge, including Arduino base knowledge and fabrication skills. But you can take shortcuts by just downing my code and printing with my sketch. All you have to do is to put everything together. In this case, anyone without further electronics or fabrications experience can also make one.
where can I purchase all the electronics?
All of the main components come from Seeed, you can purchase them from their Taobao in China. For overseas friends, you can shop at Amazon.

Progress & Documentation